How to connect Obscene Studio to OBS Studio
P2D
5
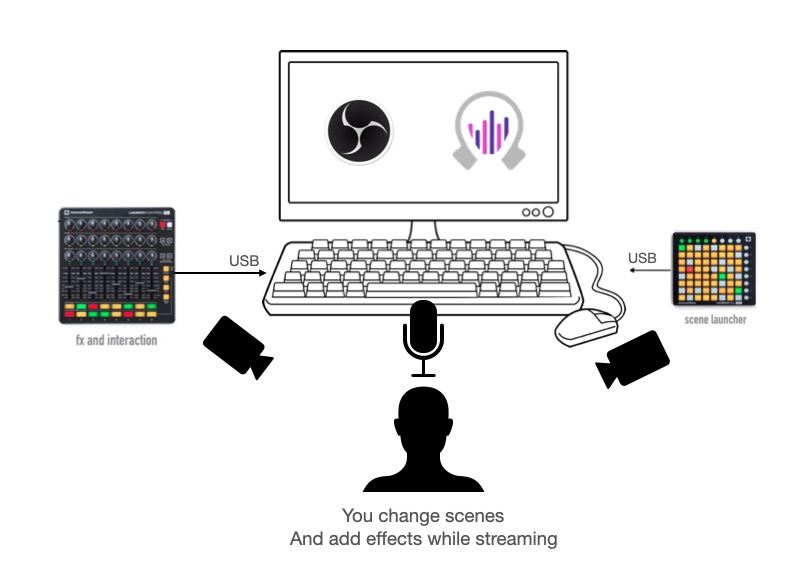
This configuration will run OBS and Obscene Studio in the same computer: By just installing Obscene Studio and configuring the OBS Overlay, you will be able to connect your MIDI Gear and use it to trigger different scenes, animations and effects
Requirements
- a windows or mac computer
- obscene studio application
- obs application
Tools needed
- computer mouse
- computer keyboard
- 1
Enter the Connection Wizard in Obscene Studio

- Start Obscene Studio Application
- Press the @fa-plug PLUG icon in the initial screen to enter the Connection Wizard
- Alternatively, you can also access the Wizard from inside the Editor. You can find it in the SETTINGS section of the Side Panel.
- 2
Configure the connection type
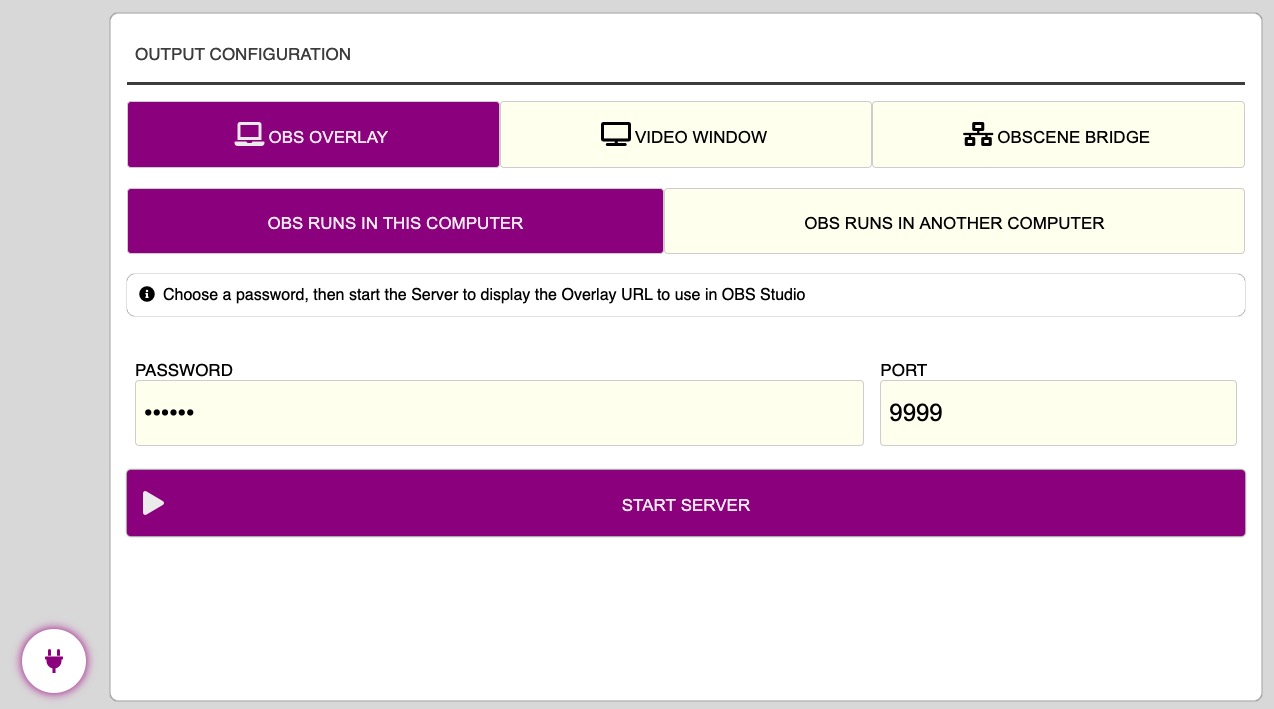
- Select OBS RUNS IN THIS COMPUTER
- Choose a Password, then start the server
- 3
Obtain Overlay URL
After pressing Start Server in the previous step, the server is active, and the Overlay URL is displayed.
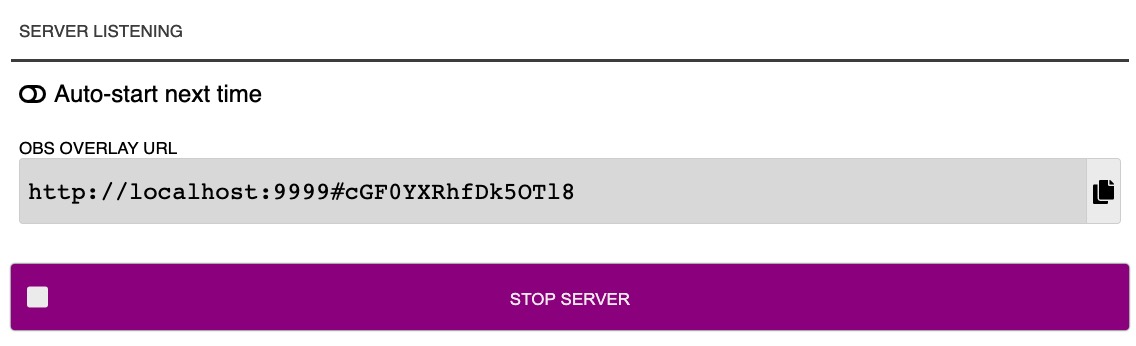
- Copy the displayed URL using the COPY Button
- Optionally, check Auto-Start Next Time so the settings are saved
- As long as you don´t change the password or port, the URL will not change
- 4
Create Overlay in OBS
Now it is time to start OBS, if you have not already done so, then follow the steps below. Note: The guide to Setup the OBS Overlay offers additional tips about the process. The following steps cover just the basics!
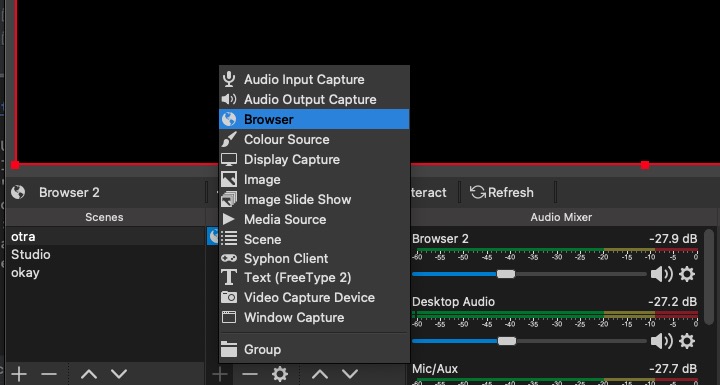
- Head to the SOURCES Section in OBS
- Click on + to reveal the popup to add a new source
- Choose BROWSER to add a Browser Source
- Adjust the created overlay dimensions so it covers the whole screen
- 5
Set Overlay URL to Obscene Studio
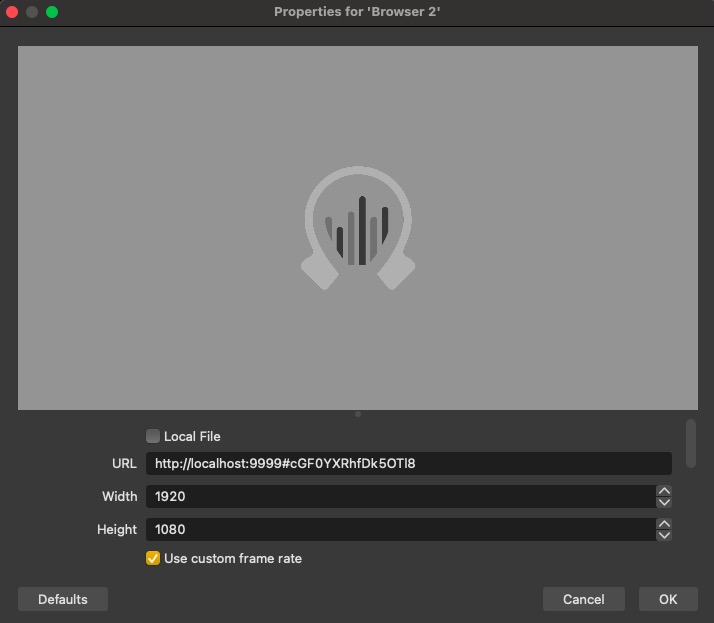
- Press PROPERTIES so the Source Properties are displayed
- Paste the URL copied before in the URL field
- Enter the right resolution values in wie width and height fields, if they are not correct after the adjustements fone on the previous step
- Press OK
published by Obscene Studio
written by Nebular Streams