OBS Studio Overlay Setup
Got a cool Overlay URL from Obscene Studio? Let’s set it up in OBS Studio!
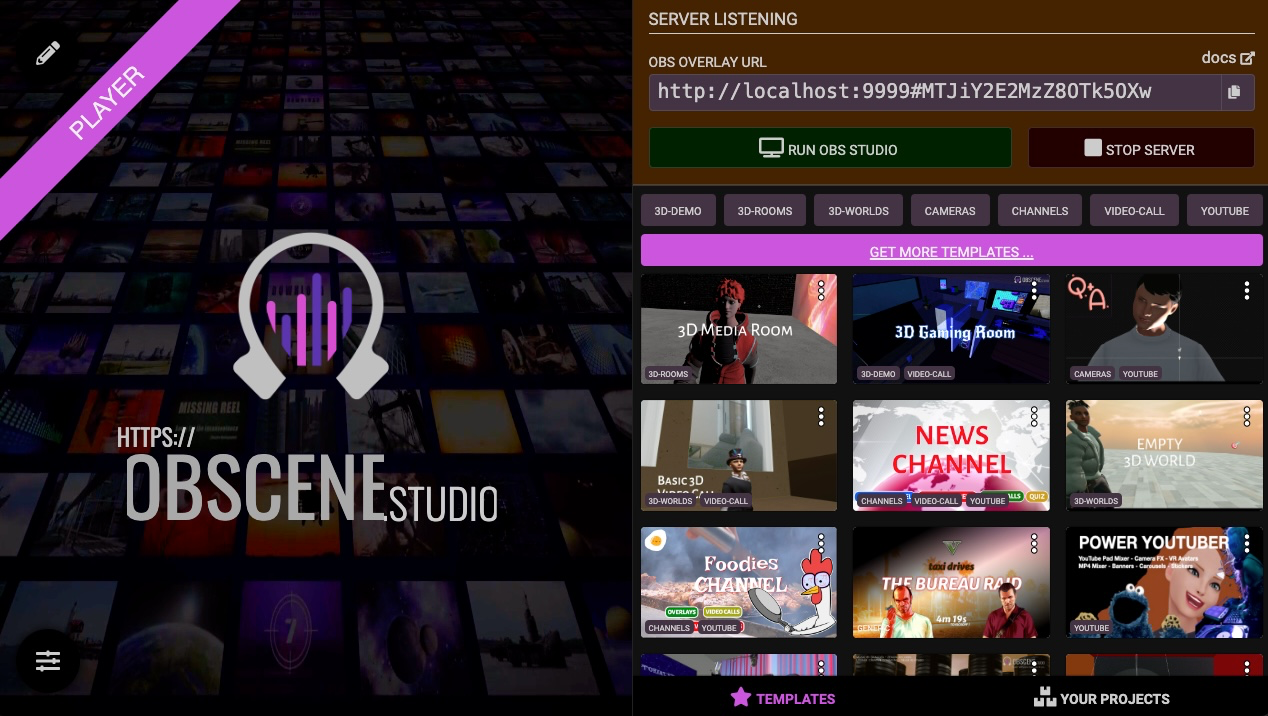
In Obscene Studio
Click the "Run OBS Studio" button. This will launch OBS Studio with the necessary settings to display cameras and media correctly.
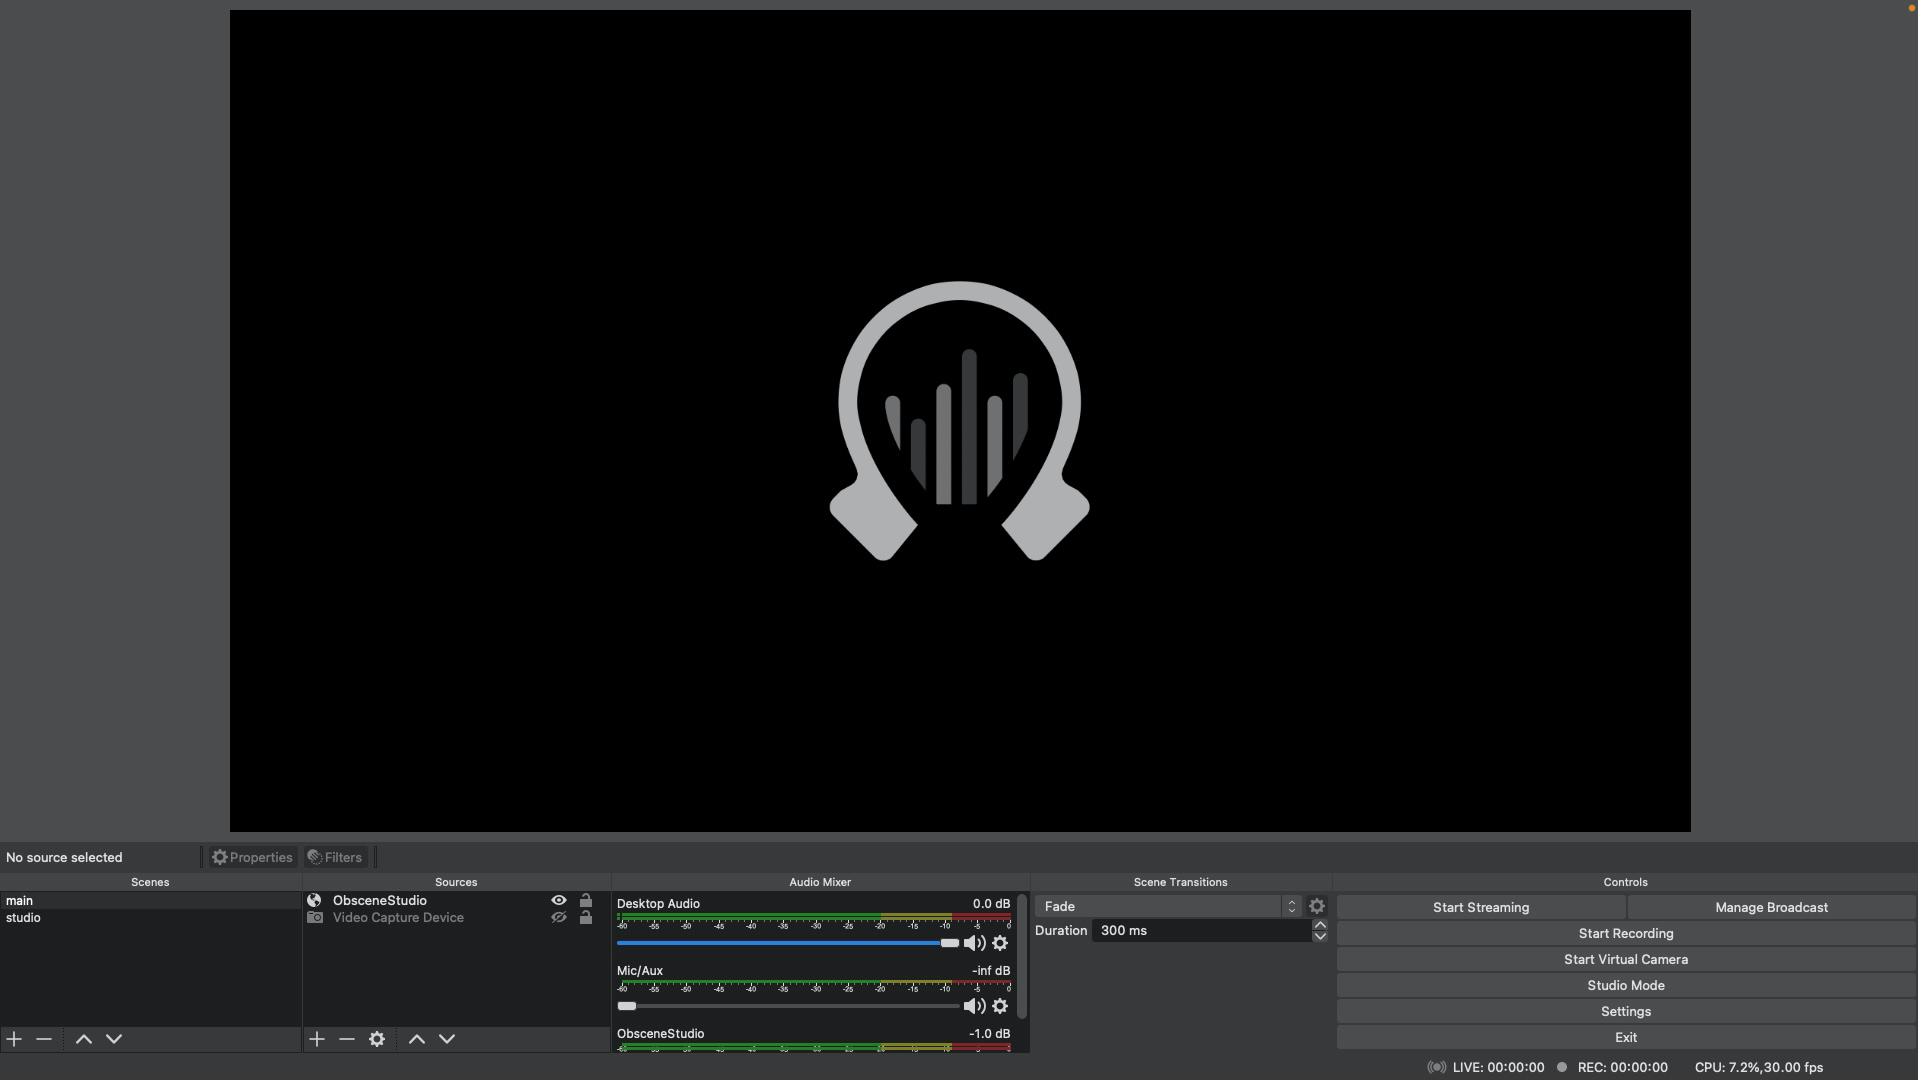
In OBS Studio
If you haven't done this already, we'll need to set up the overlay. You only need to do this once.
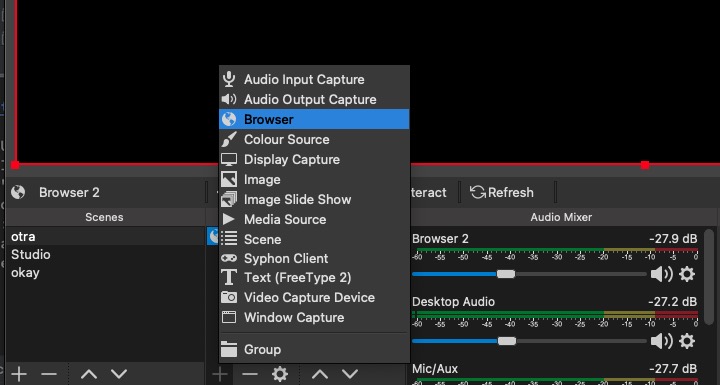
Setting up the Overlay
Add a Browser Source to your scene, over your live stream
Click "Properties" and paste the URL you copied earlier.
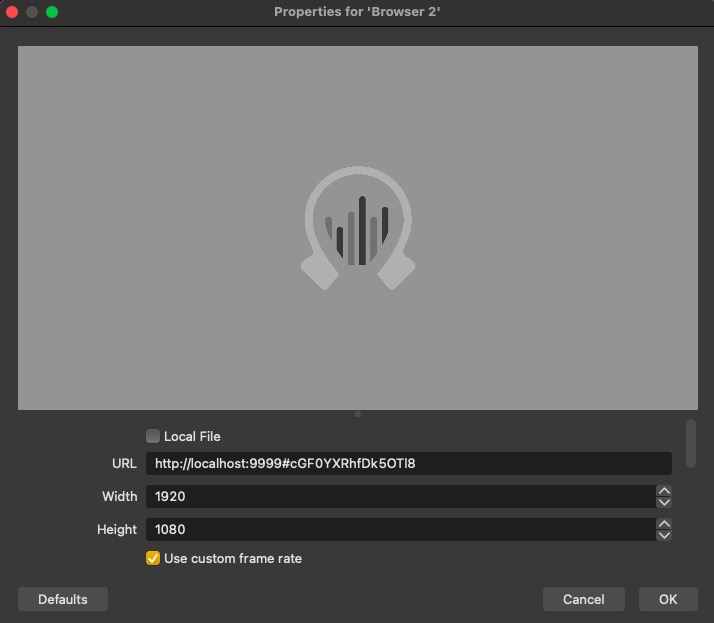
Adjust the rest of the settings as shown below
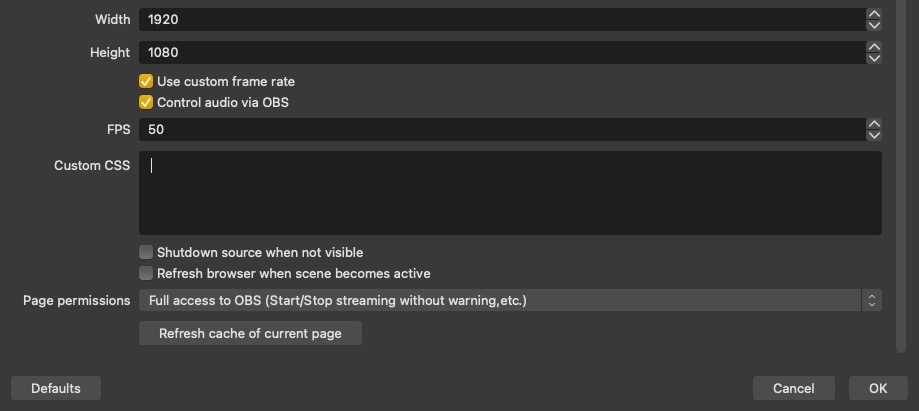
For optimal performance, set the preferences as displayed (adjust the scene size as needed).
Remarks
- Typically, you’ll want to uncheck Refresh browser when scene becomes active and Shutdown source when not visible, especially if you plan to change OBS Studio scenes from Obscene Studio.
- Set FPS to 60 for smoother results.
- Page Permissions:
- Set to Full Access to OBS Studio (level 4) if you want to change scenes from Obscene Studio.
- If not, at least set to level 1 (Read Access to OBS Studio Status) so live streaming and recording status can be displayed in Obscene Studio.
- It’s best to leave Custom CSS empty. If you occasionally see a white background due to network issues when loading the overlay, restart OBS Studio.
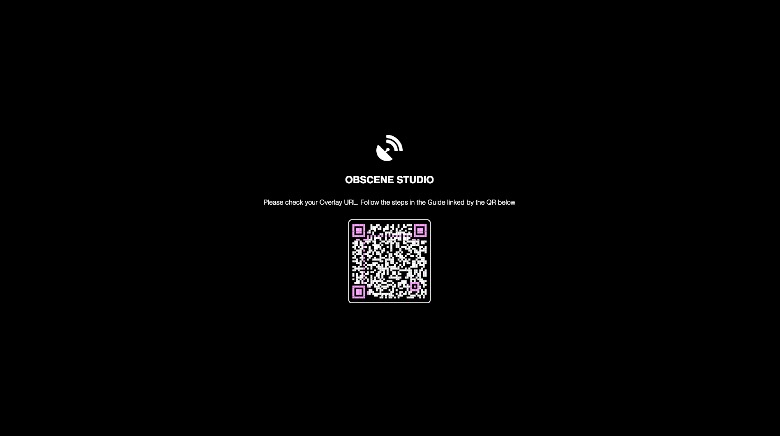
Connection Success
If everything is set up correctly, you should see the Obscene Studio logo in OBS Studio.
From now on, any storyboards opened in Obscene Studio will be displayed here, and OBS Studio scenes will be changed by Obscene Studio according to your storyboard configuration.
Troubleshooting
If you run into issues, here are some common solutions:
OBS Studio won’t connect to Obscene Studio
| Screen or error message | Probable Cause |
|---|---|
 |
You entered an invalid URL. The QR code links to this page. |
 |
You entered an apparently valid overlay URL, but it might be outdated, or there are network issues. Double-check the steps in this guide and ensure both computers are on the same private, local network (e.g., same Wi-Fi or home network). |
Camera Objects not properly displayed
If Camera Not Available is shown inside the camera objects instead of the video signal, it means you need to start OBS Studio with a special parameter to grant Obscene Studio Overlay access to the video cameras.
The "Run OBS Studio" button handles this automatically, but if you need to do it manually, follow these procedures for Mac or Windows computers.
 No permission for cameras in OBS Studio Overlay
Procedure for Apple Mac Computers
On Apple Mac computers Please make sure OBS Studio is closed, then open a Terminal (Utilities > Terminal) and type the following code:
/Applications/OBS Studio.app/Contents/MacOS/obs --enable-media-stream--use-fake-ui-for-media-stream
Procedure for Windows Computers
On Windows computers Please make sure OBS Studio is closed, then open a Command Prompt and type the following code:
"C:/Program Files/OBS Studio/obs.exe" --use-fake-ui-for-media-stream --enable-media-stream
The application may be installed in a different location. Check the usual Windows folder for installed applications.
