Standalone Obscene Studio Setup
This configuration features a dedicated computer for Obscene Studio and the midi controllers. Media content is streamed to OBS Studio using the local network.
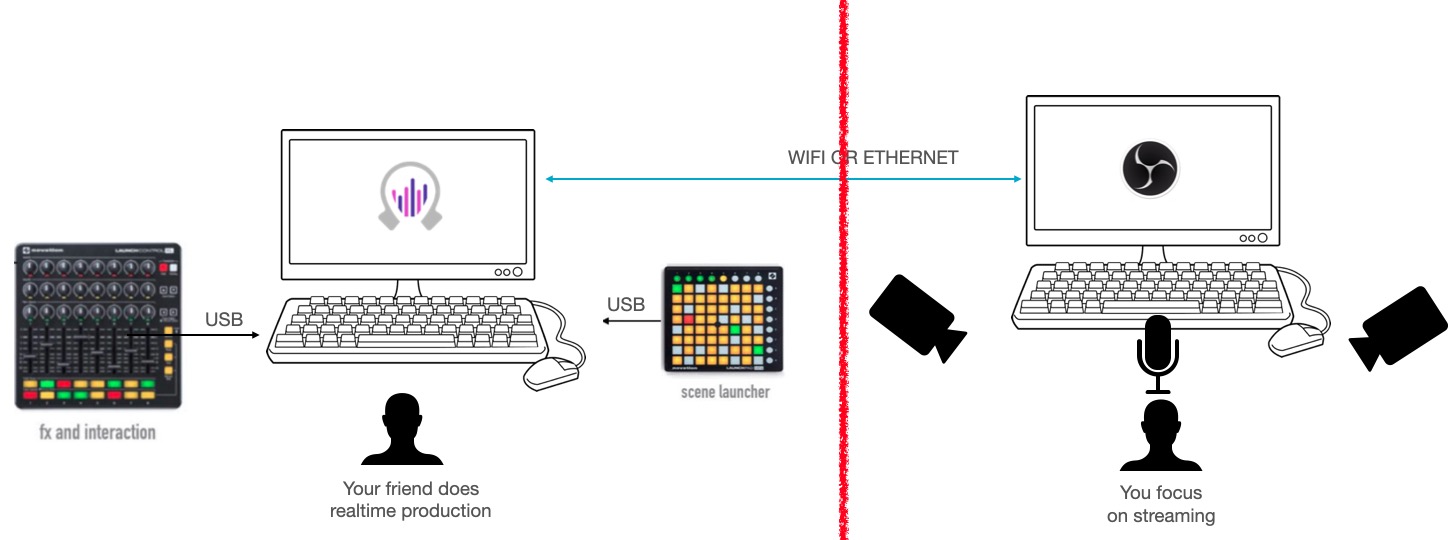
Note you will need to run Obscene Studio in both machines (but the one running within OBS Studio will not consume resources, as it is just a bridge, everything will come from your other computer)
In the computer where you intend to run Obscene Studio
- Start Obscene Studio and press the PLUG icon at the opening screen.
- Select "OBS Studio RUNS IN ANOTHER COMPUTER"
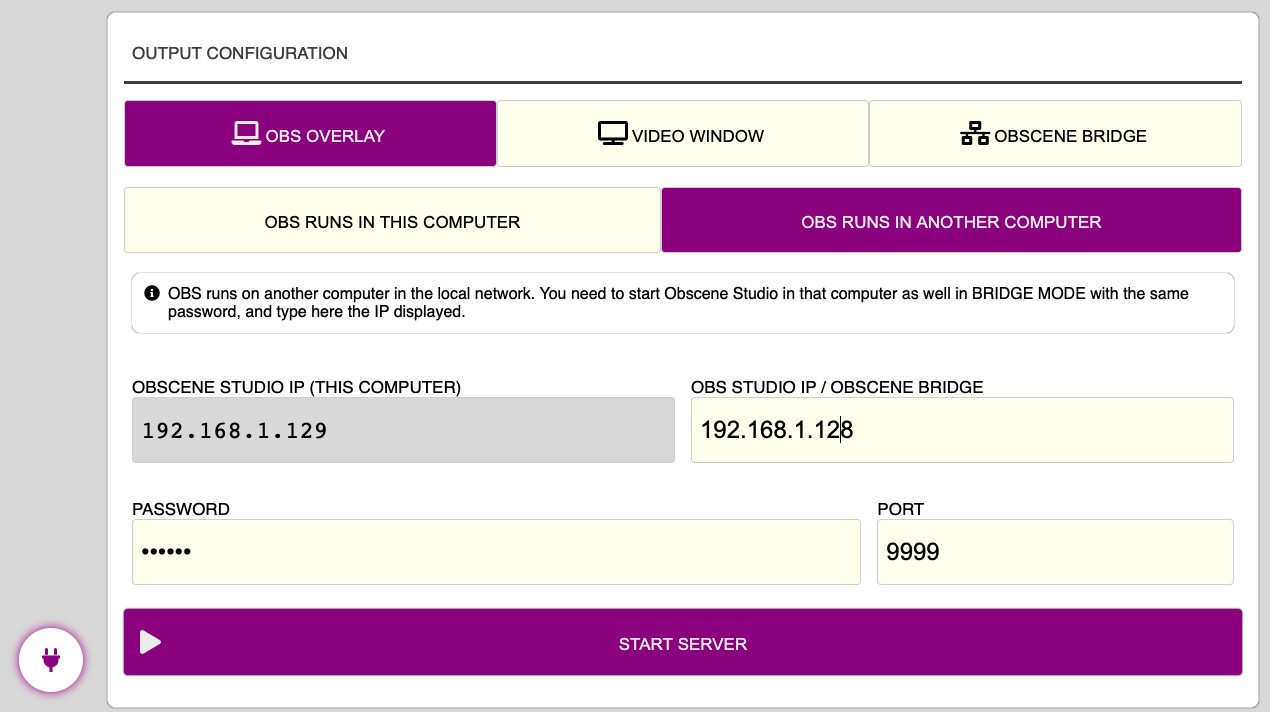
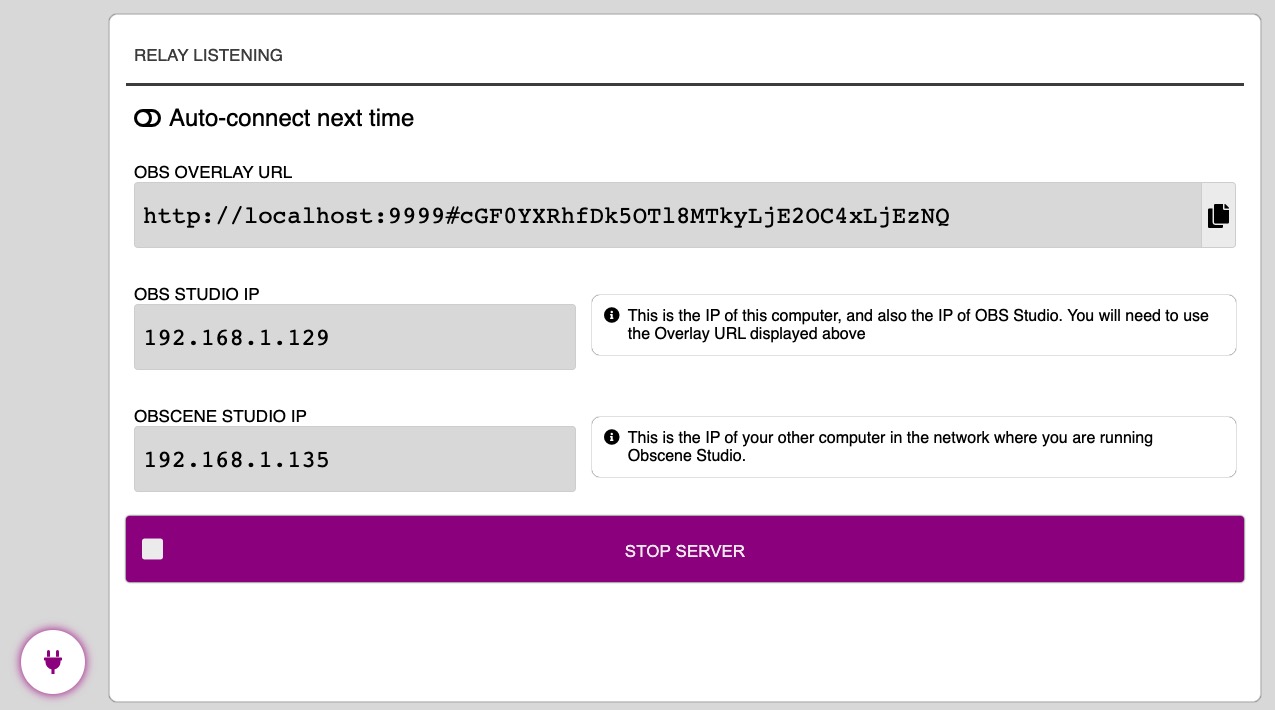
- The IP of this computer will be displayed. You will need to type it on the other side.
- You need to enter the IP where OBS Studio is running. This is provided in next step.
- After you know the IP address of the other computer, press START SERVER.
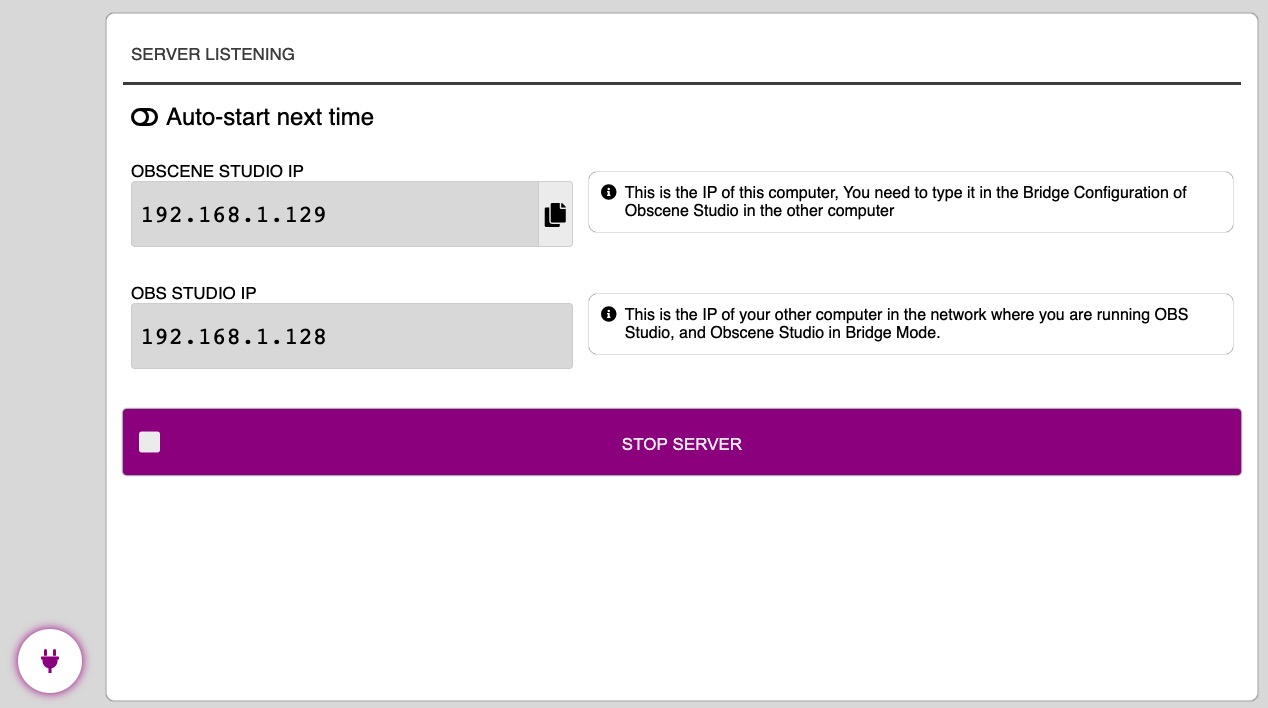
In the computer with OBS Studio
- Install Obscene Studio if not yet installed. No need to copy any content, just the application.
- Start Obscene Studio and press the PLUG button on the opening screen
- Select "OBSCENE BRIDGE"
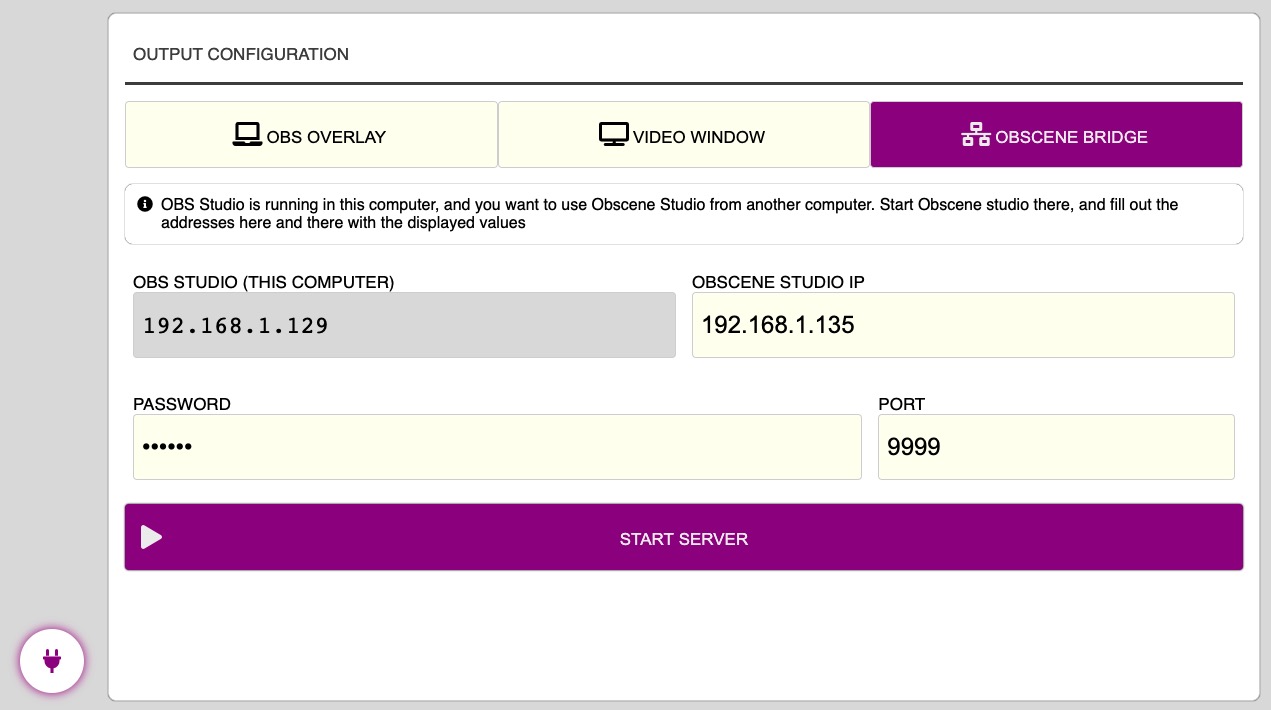
- Type the IP of your other computer in the input box
- Check out the IP of this computer, displayed in the panel, and copy it on the other computer.
Press START in both computers. The computer with the bridge will display the overlay URL:
Finally, in OBS Studio
Please Follow the guide to Setup the OBS Studio Overlay. The following covers just the basics:
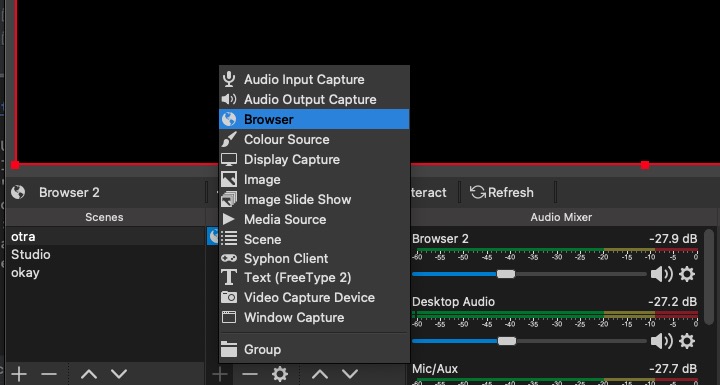
- If not done already, add a Browser Source to your scene, over your live steam
- If not done already, press "Properties", and type the URL copied before.
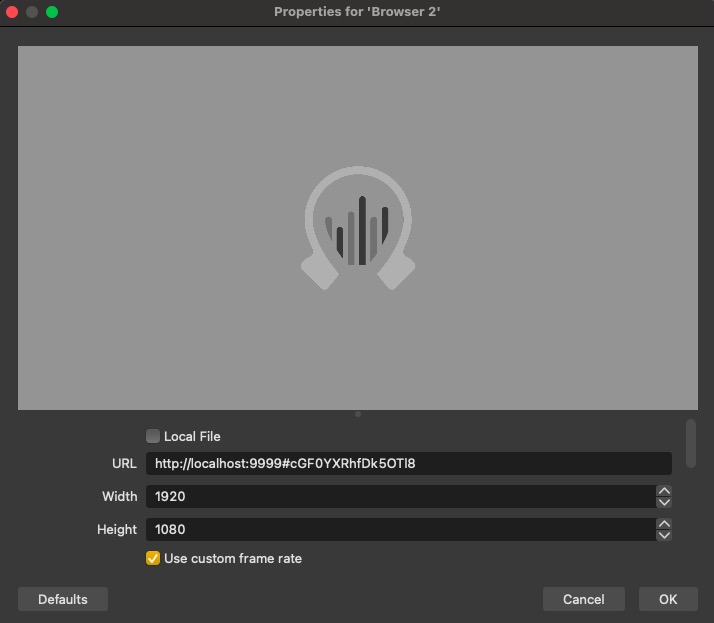
- You should see Obscene Studio logo now in OBS, and at this point, you will control what is displayed using your
other computer.

Fine-Tuning Performance
As mentioned before, check out the guide to Setup the OBS Overlay - It provides useful tips to maximize Obscene Studio Performance.

