Obscene Studio Setup
We will just install Obscene Studio and configure the OBS Studio Overlay. Later you will be able to connect your MIDI Gear and use it to trigger different scenes, animations and effects.
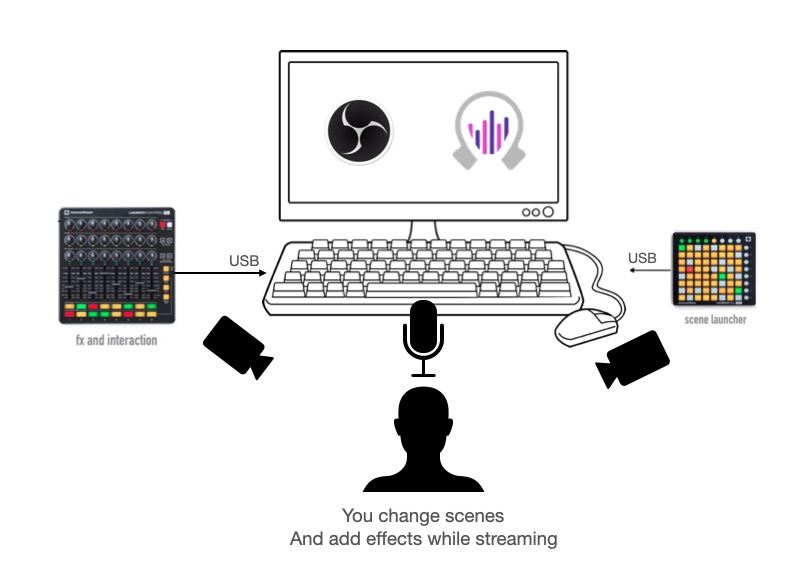
How to get it working
Follow the guide to Install Obscene Studio if you have not already done so.
1 - In Obscene Studio:
Start Obscene Studio Application
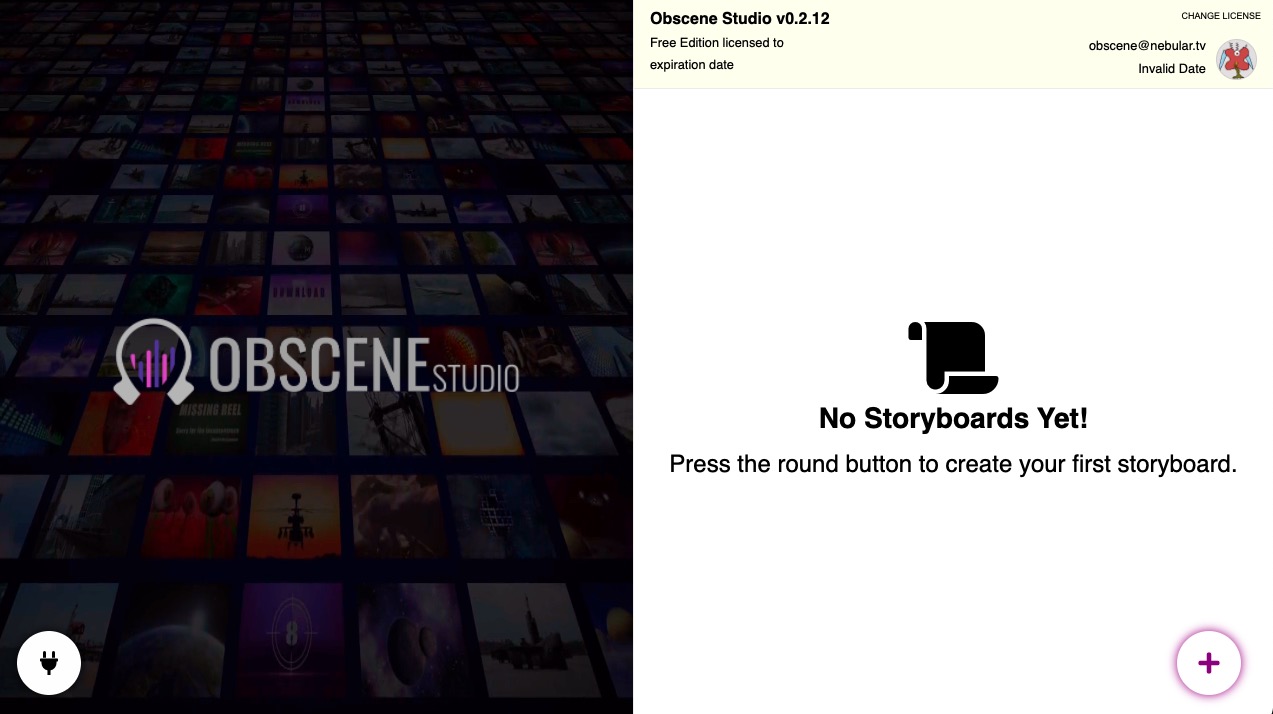
Press the PLUG icon in the initial screen to enter the Connection Wizard
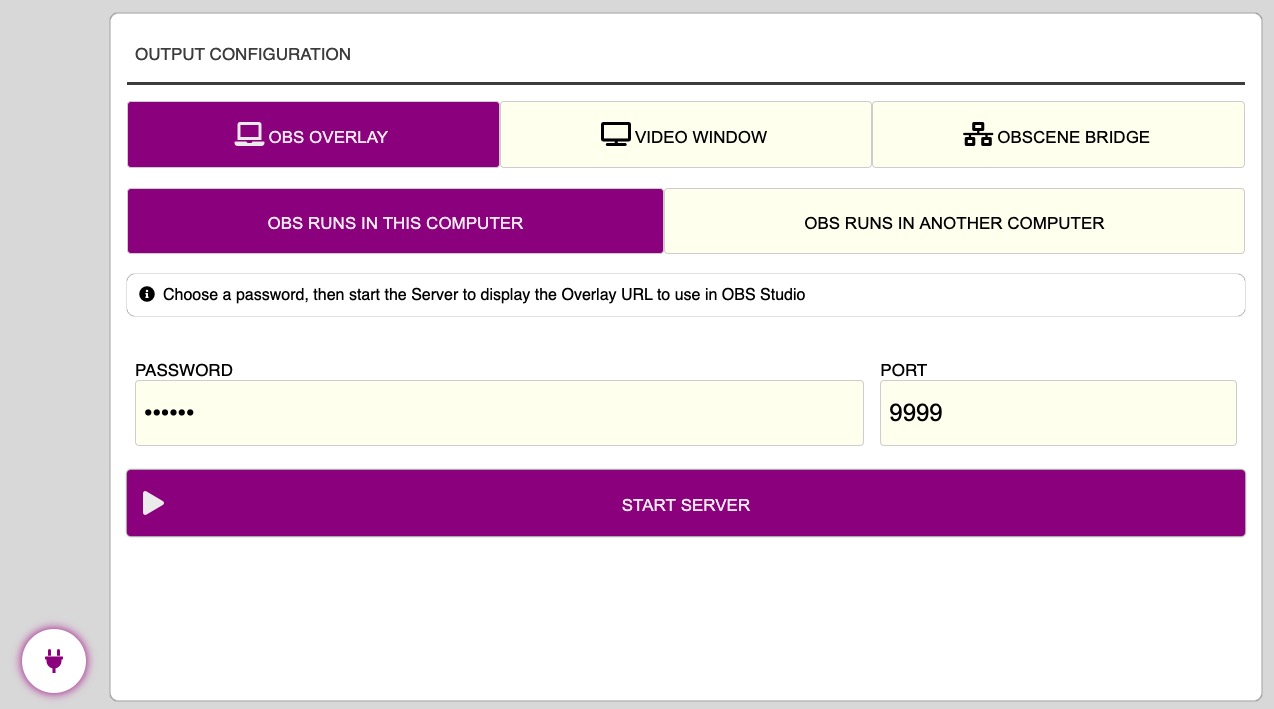 Connect to OBS Studio in the same computer
Select "OBS Studio RUNS IN THIS COMPUTER"
Choose a password and press "START SERVER"
Note about security: When you press "START SERVER" in Windows, you may get the following warning from your Firewall, where you should select the FIRST option ONLY (Local Network): 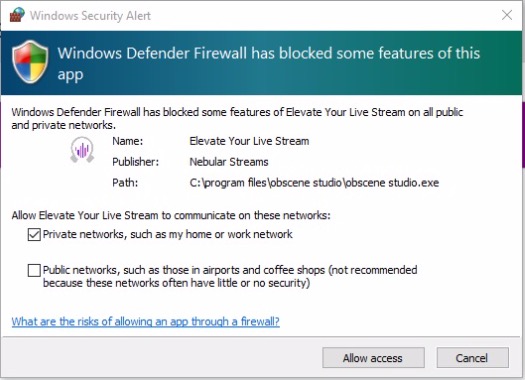 This way, Windows will make sure nobody from outside your home will be able to connect to your OBS Studio / Obscene Studio rig. Mind that Obscene Studio also enforces this restriction by itself, but Windows Firewall is better suited for the job.
 Copy the Overlay URL displayed (with the copy button)

2 - In OBS
Now it is time to start OBS, if you have not already done so, then follow the steps below. Note: The guide to Setup the OBS Overlay offers additional tips about the process. The following steps cover just the basics!
2.1 - Add a Browser Source to your scene, over your live steam
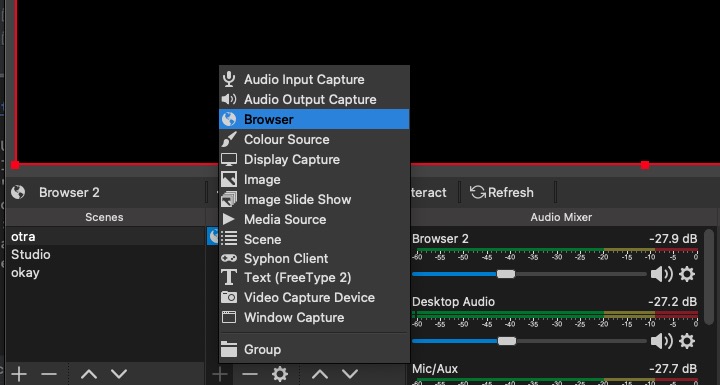
2.2 - Press "Properties", and type the URL copied before.
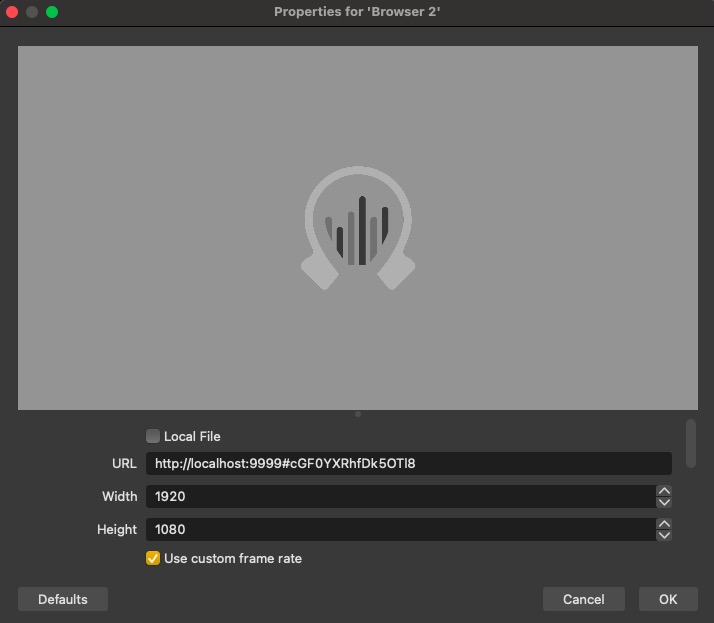
If things go well, you should see the Obscene Studio logo in OBS.
From this point, storyboards opened in Obscene Studio will be displayed here, and also OBS Scenes will be changed by Obscene Studio (according to your storyboard configuration)

Video Tutorial
Watch the video tutorial!

