Suggested Setups
Obscene Studio is a very flexible tool, designed to seamlessly integrate into your streaming rig in a non-invasive, predictable way: You will always be in control !
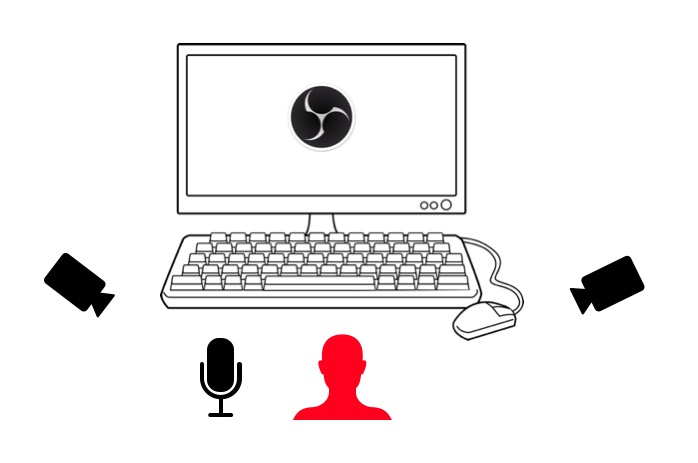
The following setups assume that you are successfully running OBS Studio, and have a bunch of stuff connected to it, like cameras and microphones, just like in this image:
Regular Live Streaming
The following suggestions are adequate for a typical livestream setup, where you use Obscene Studio and some cameras and microphones as input.
Take a look at the following possibilities, and decide which one best fits your workflow: You can do it all yourself, or let a member of your team take care of the magic, even from another computer !
Simple Live Stream Setup
In this simple setup, we will just add Obscene Studio into the equation. It will run in the same computer, and you will also connect your MIDI controllers to it.
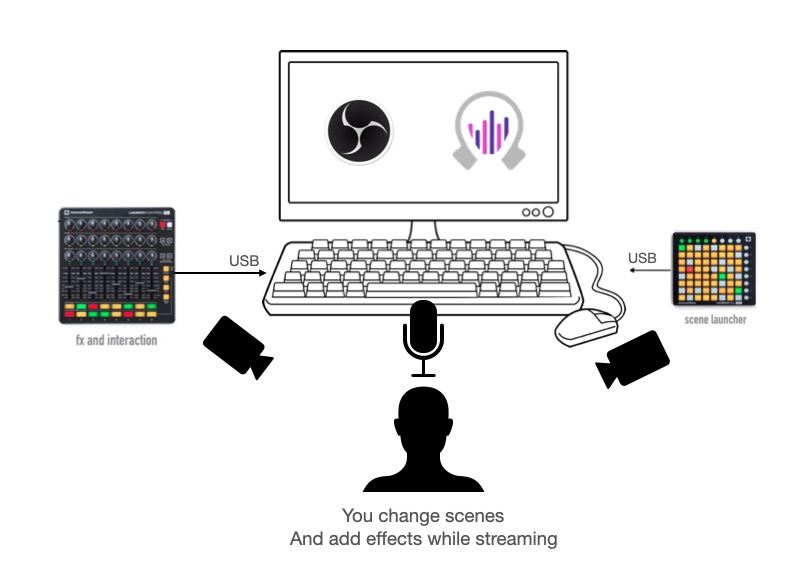
You now can trigger scenes and add effects and content in realtime.
Check out the Step By Step Guide if you want to seup this configuration. You will learn to
- Run obscene studio in the same computer where OBS Studio is running
- Connect OBS Studio and Obscene Studio
- Check that things are working
Live Stream + Production Station
This other suggestion uses a separate computer for Obscene Studio and its gear. This is ideal if you just want to focus on streaming, while another member of your team is in charge of the magic.
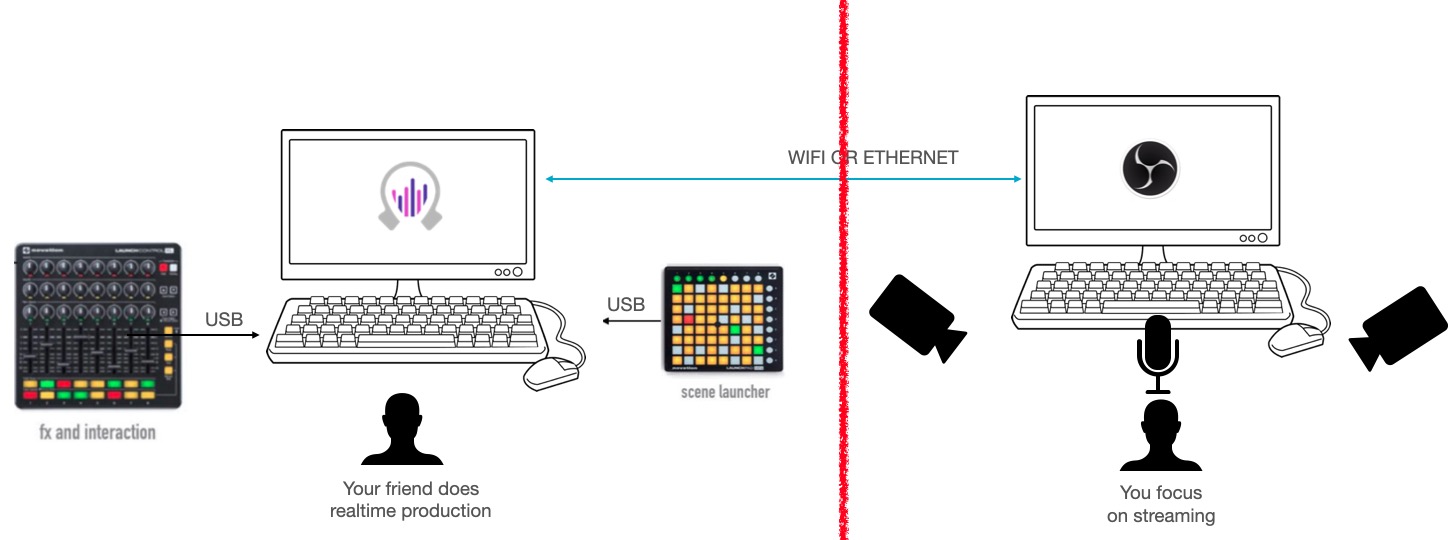
Check out the Step By Step Guide if you want to seup this configuration. You will learn to
- Run obscene studio in a separate computer in the local network
- Setup Obscene Bridge, so OBS Studio can connect to Obscene Studio across your network
- Check that things are working
Separate Touch Computer with Obscene Studio
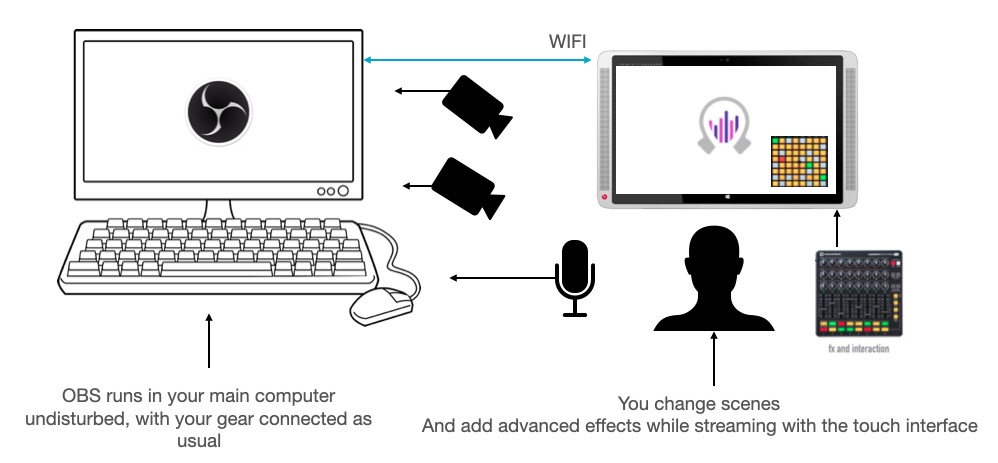
A more powerful setup if you have a Windows Touch computer.
Install Obscene Studio in it, and connect via WIFI to OBS Studio.
You can then connect your MIDI controllers to the Touch Device, and conveniently use both things during your live streaming.
Obscene Studio features a great integration with touch devices, and some bespoke features that are much cooler than with a regular mouse.
Follow the same Step By Step Guide to setup this configuration.
Touch Production Station
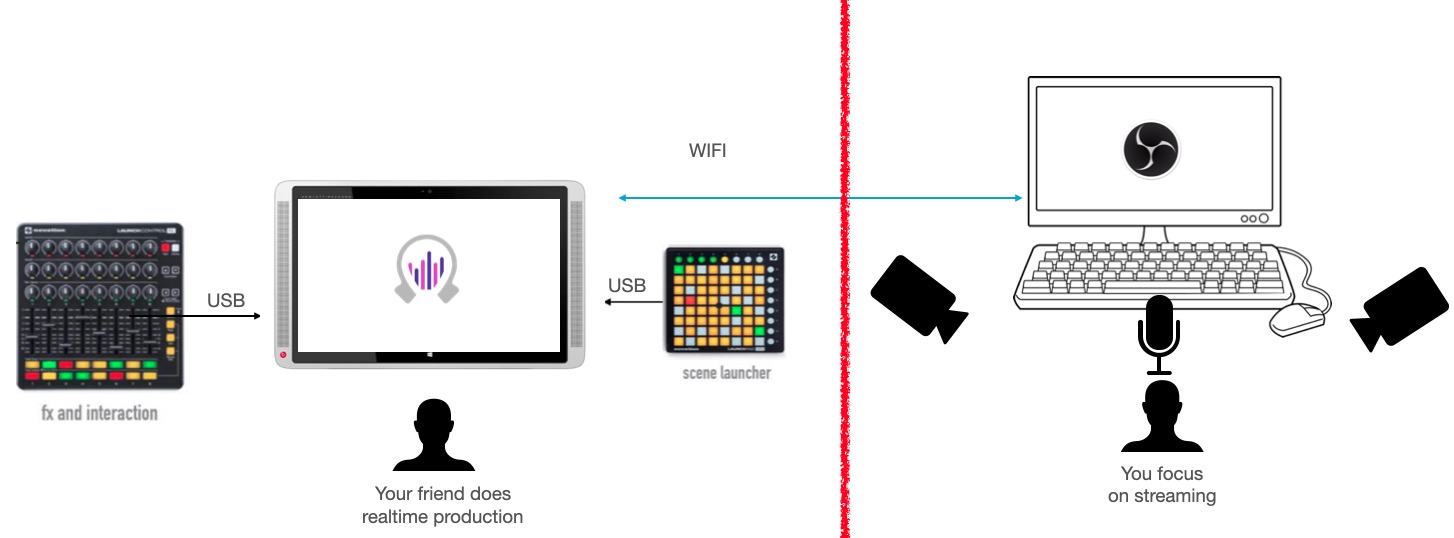
A variation of the above, where another member of your team takes care of the magic while you just focus on streaming as usual.
Follow the same Step By Step Guide to setup this configuration.
Gaming Livestream Setups
These setups assume you will be mainly displaying a console game, connected to Obscene Studio / OBS Studio through, for example, a cheap HDMI Input USB Device (around $20)
While you can just display the signal in OBS Studio as usual and use Obscene Studio to add overlays, you can also let Obscene Studio manage the Video In signal, and add awesome realtime effects. And it has loads!
Simple Gaming Live Stream Setup
This setup is similar to the basic Live Stream Setup, only we will connect a Console as a video source.
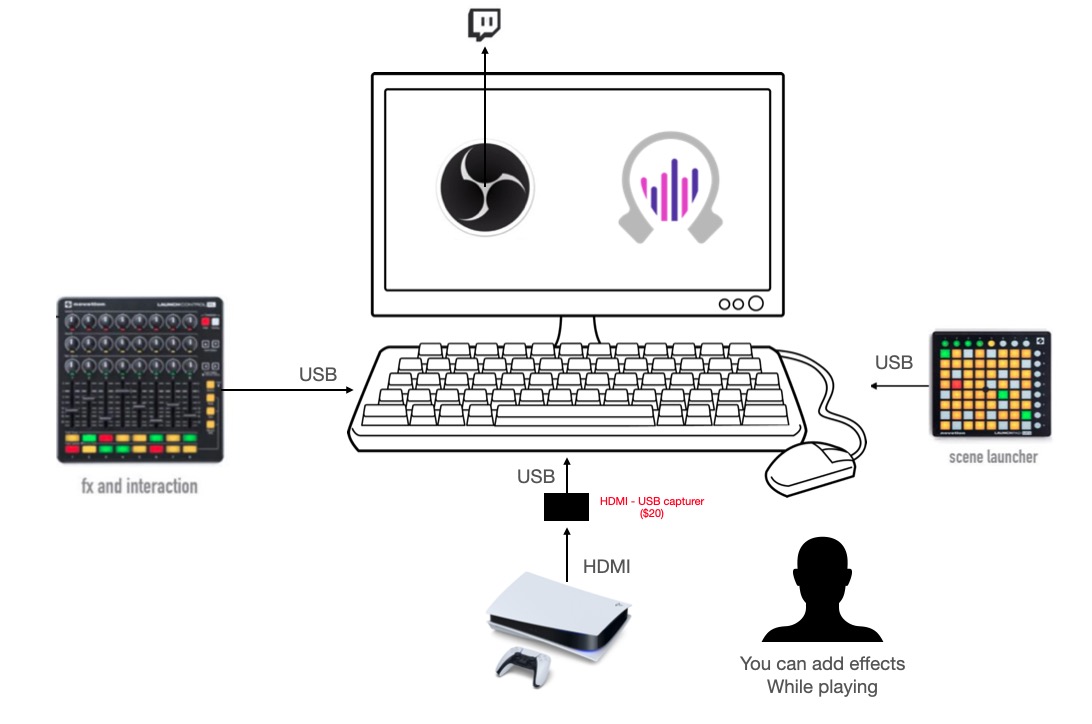
As detailed in the Step By Step Guide, the configuration will require to:
Run obscene studio in the same computer where OBS Studio is running
Connect OBS Studio and Obscene Studio
Once things are working, you will need to
Connect your console to a HDMI Video In adapter
Use the Gaming Livestream Template, or create one from scratch.
Separate Production Station
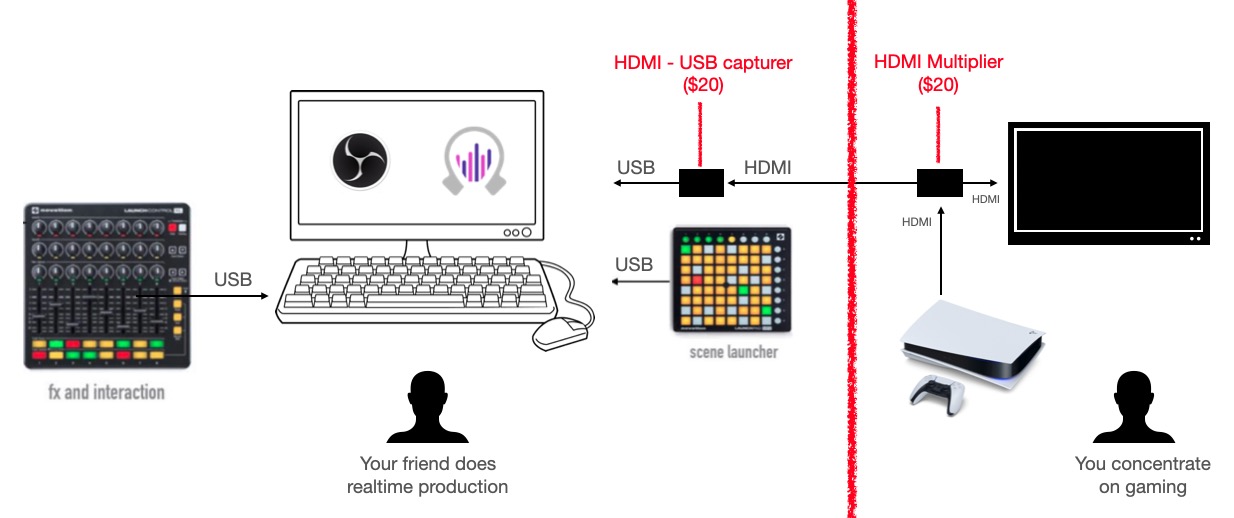
You can also decide to concentrate on gaming, while another member of your team takes care of adding crazy things to the screen and further engage your viewers.
This configuration allows to easily separate both things.
Follow the Step By Step Guide to setup this configuration.

