3D Live Streaming
With Obscene Studio you can design or download a 3D environment, then live-stream from inside!
We call this feature "The Virtual Room"
Downloading a Virtual Room
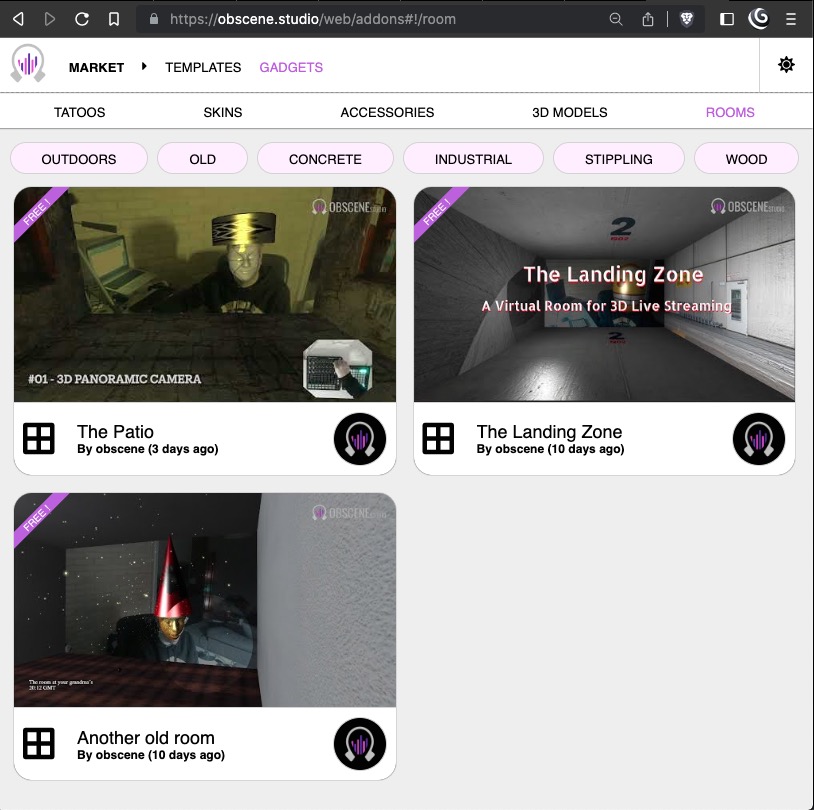
The Obscene Market contains lots of Virtual Rooms created for you - well, not yet lots - but definitely a growing bunch !
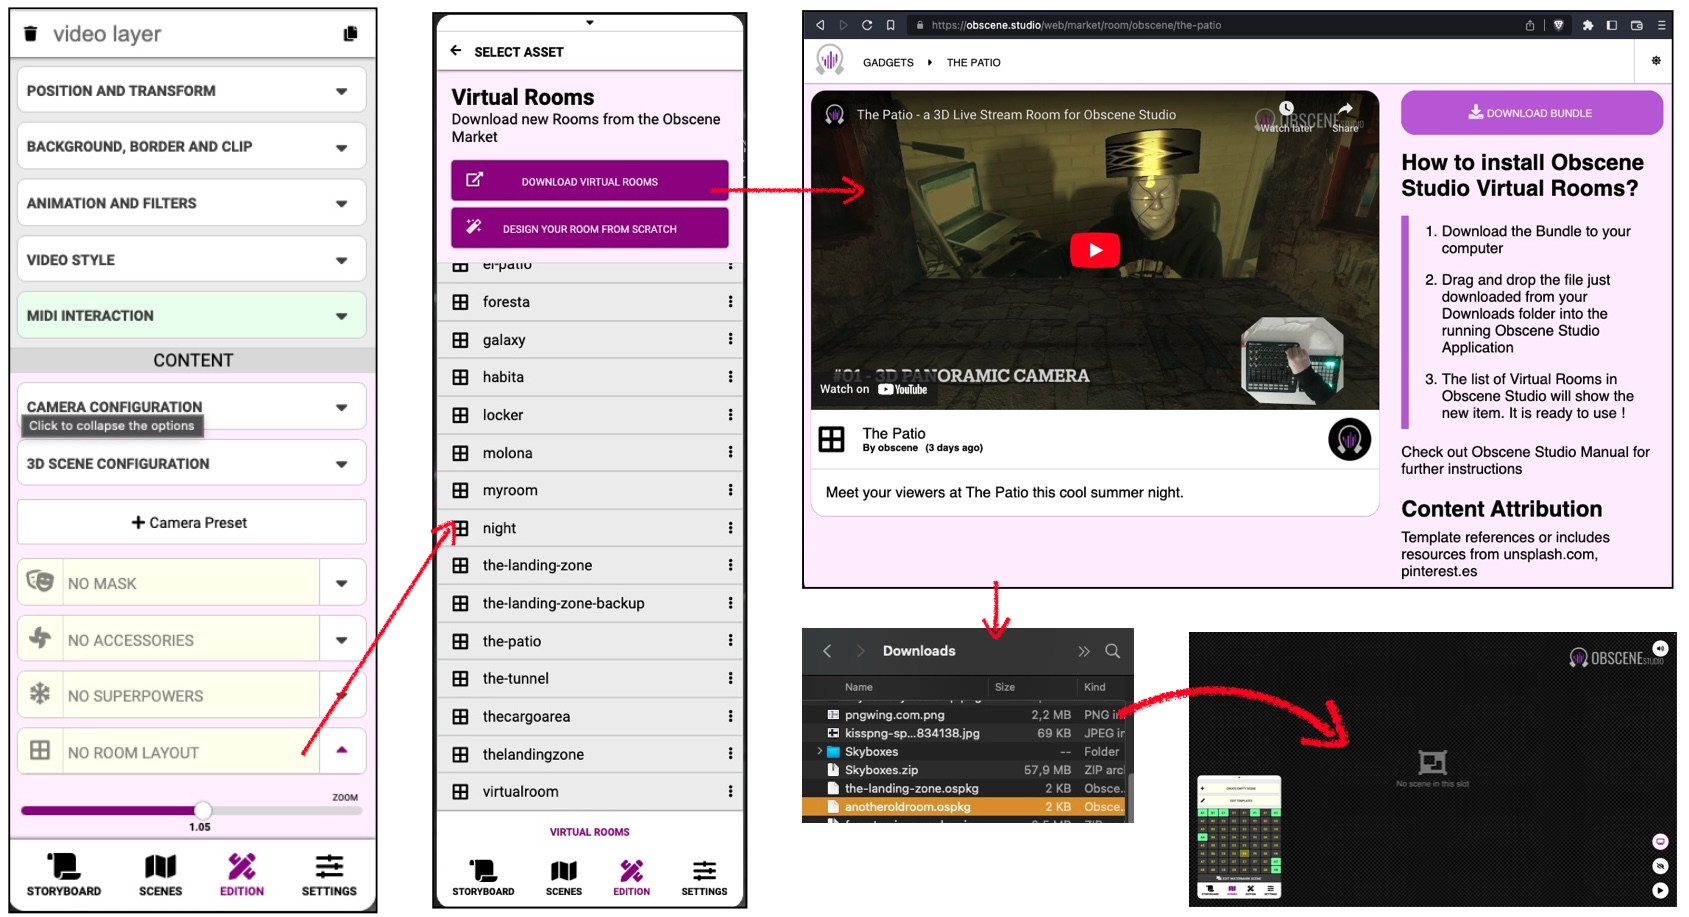
Let´s download and activate a Virtual Room. To do so, just select the object in the scene with the 3D camera. This will show its property cards in the Side Panel:
 Downloading a Virtual Room from the Obscene Studio Market
In the lower section click on the Room Selector - where No Virtual Room is displayed.
A list of existing rooms will be displayed, but it may be empty if you have not yet downloaded or created a Virtual Room.
- Click on the button Download Virtual Rooms to open the Obscene Studio Market in your browser.
- Browse and download a room that you like.
- Drag and drop the downloaded file into the running Obscene Studio application
- Now it will be shown in the list ! Just click on it to activate the room.
Creating a Virtual Room from Scratch
It is really easy to create new Virtual Rooms and save them for a later use. To do so, just unfold the Virtual Room property card to reveal the different components of a Virtual Room:
 The Virtual Room Property Card with the different elements: Ceiling, Floor, Left and Right walls, and the Skybox
The Floor, Walls and Ceiling
Each Wall, Floor and Ceiling can be assigned a texture of your choice or creation, or even a HD Video.
To get started, just click on the different room components, as shown in the image below.
- Click on the item body to change the texture, or start a new one from scratch
- Click on the caret at the right to reveal additional properties for the Virtual Room element.
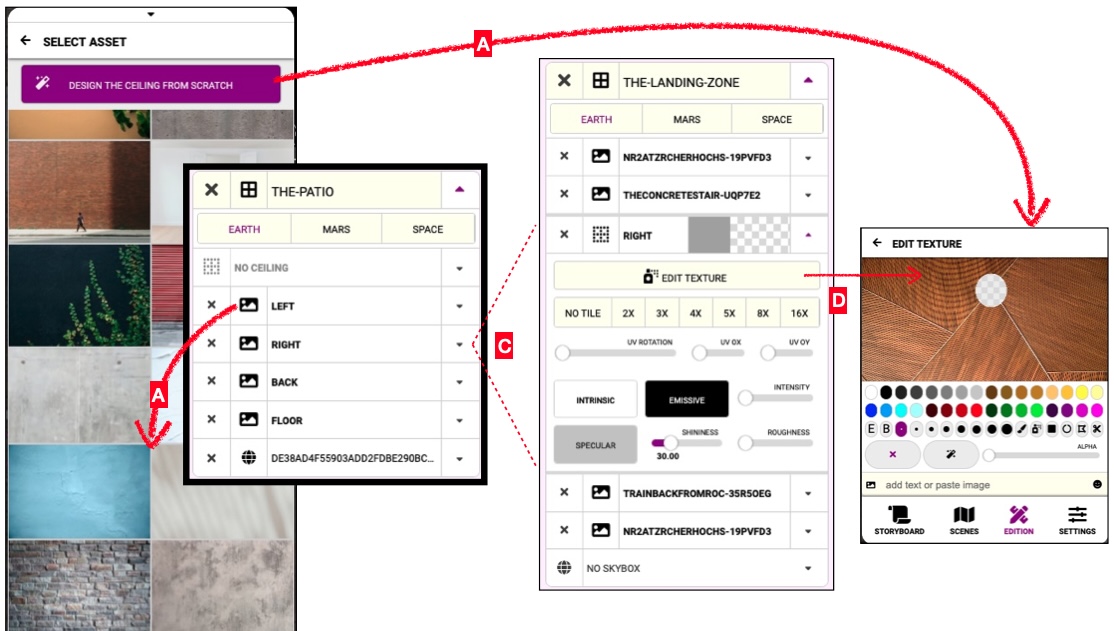 Workflow to create or edit a Virtual Room
After a texture, camera or video has been selected, you can setup many other parameters by unfolding the Room Wall Property Card:
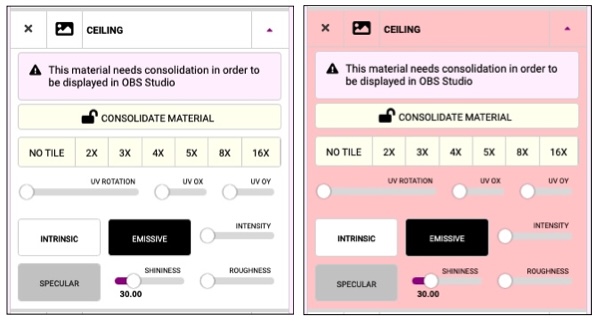
From top to bottom,
- The Consolidate Button writes all changes in the room element and creates the final texture. You will need to do this so your changes are visible while Live Streaming.
- The Tiling Mode allows to use the texture as a tile with a customizable size and orientation
- The Lighting Properties like the Intrinsic, Emissive and Specular Colors define how the light will reflect in this surface
- Roughness and Auto-3D use AI to automatically create 3D contours of your uploaded images.
The Skybox
A skybox is a method of creating backgrounds to make a 3D scene appear larger than it really is.
When a skybox is used, the room is enclosed in a cuboid. The sky, distant mountains, distant buildings, and other unreachable objects are projected onto the cube's faces, using a technique called cube mapping, thus creating the illusion of distant three-dimensional surroundings.
Obscene Studio supports 2 types of skybox images:
- The Standard Cubemap
- The Equirectangular Images, also called 360 images
You can create them yourself, but also will find millions online! Image below shows a google search of just those terms:
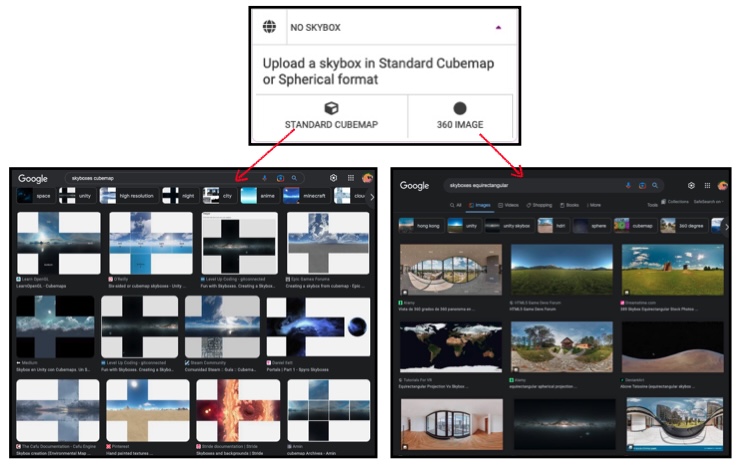 Skybox workflow: Choosing a Cubemap or a 360 (Equirectangular) image as skybox
For optimum quality, use Skyboxes where each side is at least 1024x1024. That means that the source image should be in the 4000 pixels league.
The Agent Ball
- If you want to use the IMMERSION mode, you must pick or design a Ball. If not, only the PANO camera will be active.
Virtual Room Cameras
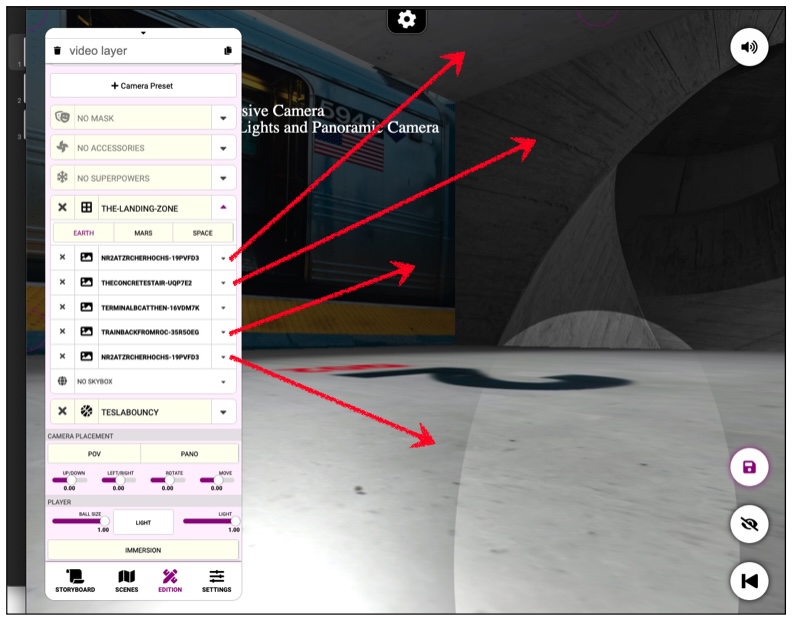
While on a Virtual Room, you can combine the views of the different available cameras.
The Panoramic Camera (PANO)
The Panoramic Camera (PANO in the sidebar) is a camera designed to focus in one wall of the room, either as a foreground or a back plane.
With this camera, you can perform a regular live stream, then at some point
- zoom out and show the whole room
- rotate to focus on a specific wall: The walls at the sides or the back wall.
- Pitch the camera up and down, focusing on the ceiling and floor.
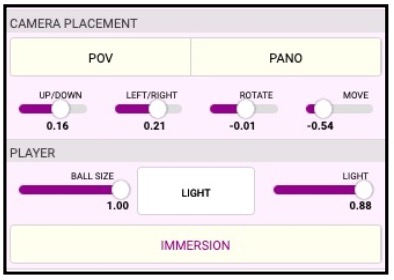
When this camera is active during EDIT Mode, you will see its controls in the lower half of the Sidebar. These controls should ideally be mapped to a MIDI Controller, or a Gamepad.
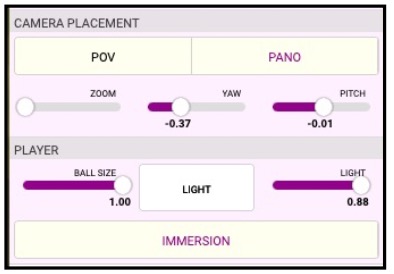
The displayed controlls allow to quickly change the different parameters of the PANO CAM:
- Zoom Moves backwards from a main foreground plane with the video wall, revealing the rest of the room.
- Yaw lets you focus on the different walls in the room
- Pitch aims at the ceiling or floor
The Agent Camera (IMMERSION)
You can move an agent drone with a camera around the room and beyond, using controls similar to those in a First-Person Shooter game.
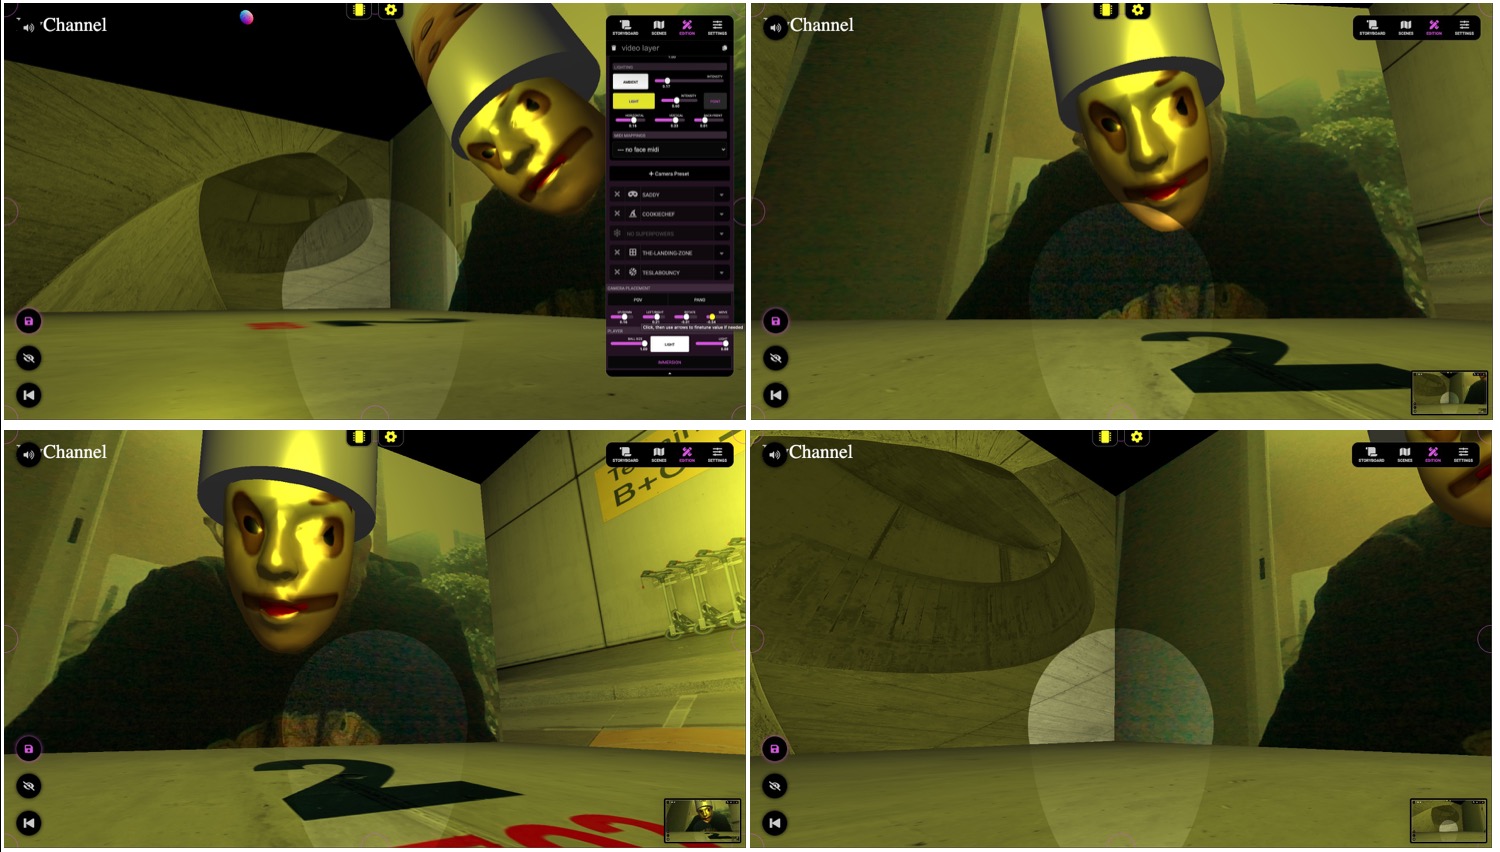 Different Views of the Agent Camera
When in IMMERSION Mode, you can use the following Controls in the Content Section of the Side Panel - or map them to a Gamepad or MIDI Controller:
- Move Agent Forward/Backward (current direction)
- Rotate Agent CW / CCW
- Move Agent Sideways
- Agent Look Up, Down, Left, Right
Additionally, these other controls are available:
- Shoot (A ball)
- Jump (Only in rooms with gravity)
- Change Ball Size (Shoot Balls)
- Turn Agent Light on/off
The POV Camera
The POV Camera is mounted atop your head! Just look around and see what happens.
The POV Camera does not have specific controls, as you control the rotation, pitch and roll just by moving your head.
Alternating Camera Views
You can change the active camera by pressing the Camera Mode Buttons:
- Pressing POV will activate the POV camera
- Pressing PANO will activate the PANO camera
- Unselecting POV/PANO (re-)activates the AGENT Camera.
You can also create Camera Presets with different active cameras, and toggle a bunch of settings at once.
Available MIDI Mappings for 3D Cameras
Use the MIDI Learn feature as described in the Scene Midi Chapter to map some of these controls to your MIDI Device or Gamepad:

All Parameters related to the 3D camera are grouped with a common prefix for your convenience:
- 3D Room: The controls active while the camera is in PANO mode.
- 3D Scene: Parameters related to the scene lighting.
- 3D Player: Parameters related to the Agent, when IMMERSION mode is ON.
- 3D Face: Parameters related to the Face Tatoo, Skin, Accessories and Superpowers
- Contents: Allow to cycle between the saved camera presets.
Related Links
- The Camera Object
- The 3D Camera Object
- MIDI Learn Functionality
