Controlling Scene Objects with MIDI Devices
Obscene Studio allows you to use different MIDI devices to control hundreds of parameters: Scene transitions, animations, size, colors, video speed, 3D camera effects …
It is really simple to use the MIDI LEARN feature and quickly map a control to any object in your scene.
MIDI Mappings and MIDI Learn
To use any midi button, controller or jog to modify an object in the scene, there is a simple procedure called "MIDI Learn": You will tweak the knob or button you want to use when an object is selected in the EDIT MODE, then select which properties the controller will modify.
- One control can modify different properties in the same object, like rotation, scale and Filter Color.
- Also, one control can modify properties across different objects: For example, you may want to move two images in opposite directions when moving a fader up or down.
Sounds complicated ? It is not! Let's see how it all works.
The MIDI Interaction Panel
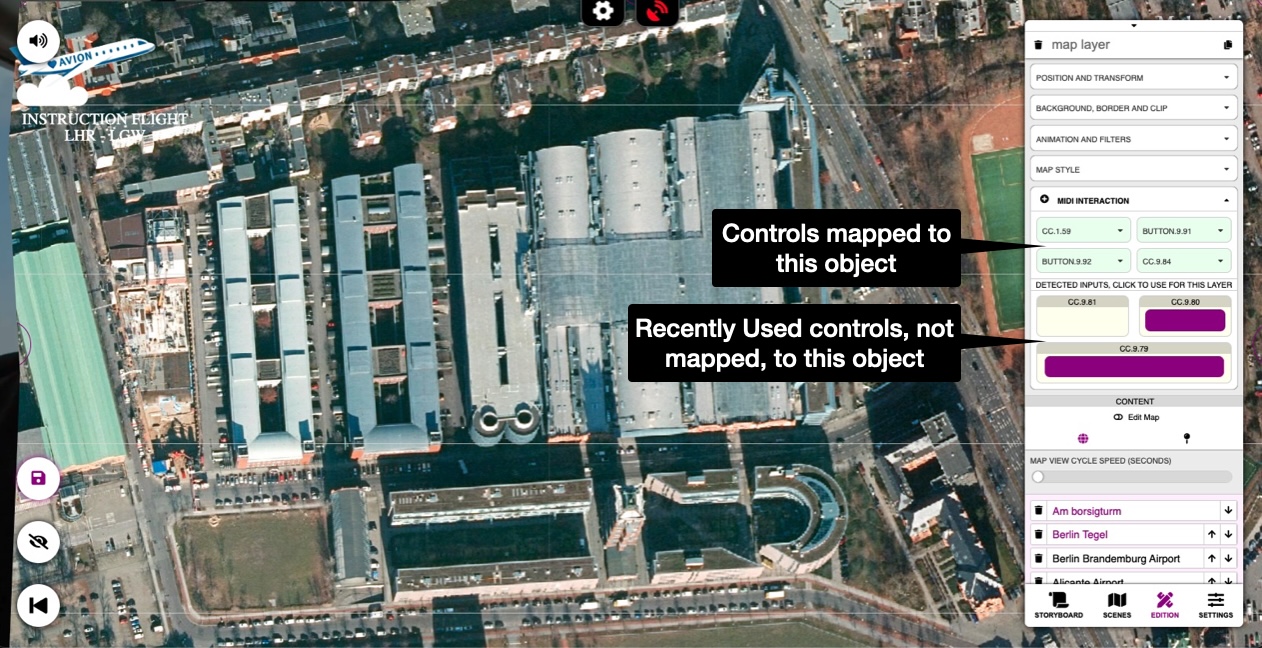
 Example map object with assigned MIDI Controls
As you can see in the example snapshot, the MIDI Interaction Panel is divided in two parts;:
- Controls that are currently assigned for the selected object.
- Controls that are not assigned, but have been recently used. These can be clicked to be assigned.
MIDI Learn Workflow
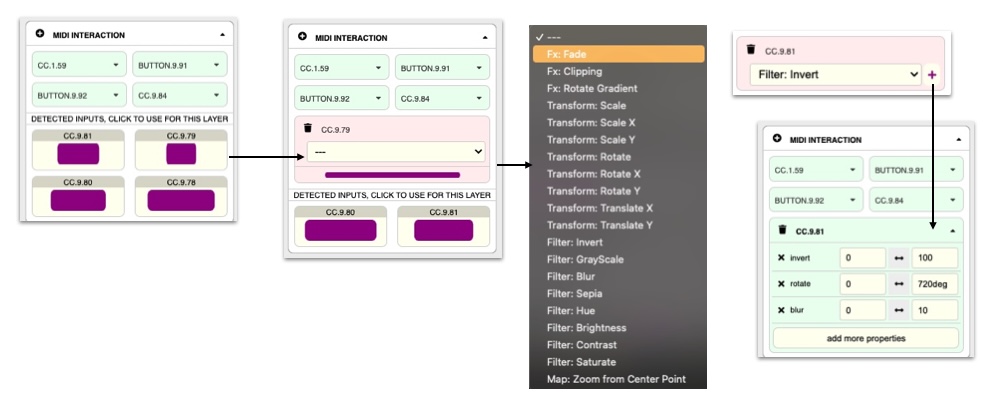
 Sequence to add and configure MIDI Mappings
Assigning a new Control
- Select the object you want to assign a MIDI Control to. Its properties will be displayed in the Side Panel.
- If not already, expand the MIDI Interaction Property Card by pressing the icon.
- Touch, press or turn the button, fader or knob that you want to use. It should be displayed in the Detected controls area, as long as that control is not in use.
- Press on that detected control. It will become aa configuration panel, where you can adjust other parameters liek Sensitivity for a Jog, or Toggle Mode for a Button.
- Press the icon to finalize the mapping.
The new mapping is created, and you will now find the control displayed as a green button.
You can now proceed to the next step, wehere we will decide which object properties will be modified when pressing or moving the control.
Adding or modifying properties to the control
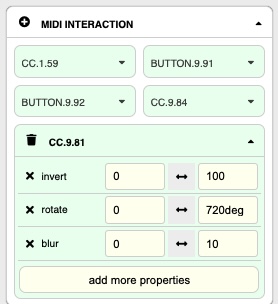
To modify the mapped properties of a control or its range, just expand the control´s panel by clicking on the caret at the right. This will reveal the table of the properties that the control modifies.

In this panel you can:
- Provide range values for the control (for example, scale from 25% to 50%)
- Configure other parameters relevant to the control (for example, the Jog Sensitivity)
Replacing a Mapped Control with another
- Expand the Control you want to reassign
- Touch the new control. It should be displayed in the bottom half (unused controls)
- Keep SHIFT Pressed - the icon in the top left corner of the control´s panel should change to a
- Press the icon. The mapped controller will be substituted with the last detected one (the one you just pressed on step 2)
Copying MIDI Mappings from one Object to another
You may need to copy all MIDI Mappings in an Object to another. This is very easy to accomplish just using the Clipboard Copy / Paste function:
Select the Object you want to copy the MIDI Mappings from.
Press (Or APPLE/CTRL + SHIFT + C) to copy the sekected Object into the clipboard.
Select the destination Object, where you want to copy the mappings.
Keep SHIFT Pressed and press in the Side Panel to acccess the Special Paste Menu
Select REPLACE MIDI MAPPINGS from the popup

Reset MIDI Controllers
In case things get a little out of control when you have a lot of mappings, you can go to SETTINGS, then select "Reset MIDI Controllers".
- This will clear in-memory state of buttons and knobs.
Related Documents
- MIDI Device Settings in the Settings Section of the Side Panel.
- Back to The Scene

