The Side Panel: Settings
The settings panel contains Property Cards that group the different settings of the Obscene Studio Application.
This section is a work in progress
There are 4 Property Cards:
MIDI Configuration
This property card allows to connect your MIDI Devices. Please see the specific document about MIDI Configuration.
Video Output Configuration
This property card configures and starts the connection to OBS Studio. Please see the specific documents for connecting to OBS Studio, specifically the guide How To Connect, that contains step-by-step procedures to successfully connect the two applications, including:
- Simple Configuration, where OBS Studio and Obscene Studio run in the same computer.
- Networked Configuration, where Obscene Studio runs in a separate computer in your local network.
- Guide to Set up the OBS Studio Overlay, a common step regardless of the chosen integration.
Also check out the Suggested Setups to learn about different possibilities to integrate Obscene Studio in your streaming stack.
User Interface
The User Interface card allows you to select the User Interface colors and position, the Workspace Zoom, and other related settings.
Dark Mode
Turn the switch to the ON position to use a dark color for the User Interface.
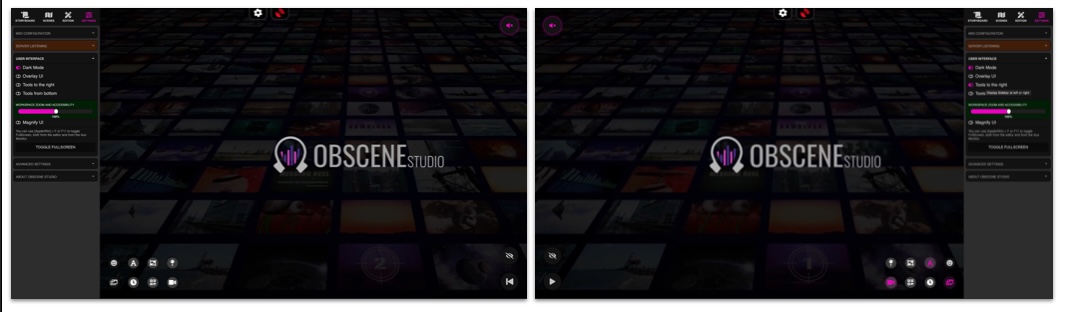 Dark Mode and non-overlaid UI
Overlay UI
Set Overlay Mode, where the Side Panel floats over your content, instead of its fixed position at the screen edges.
Tools to the Right / Tools from Bottom
Changes the Side Panel placement
- Left or right side of the screen
- Bottom-Top or Top-Bottom layout.
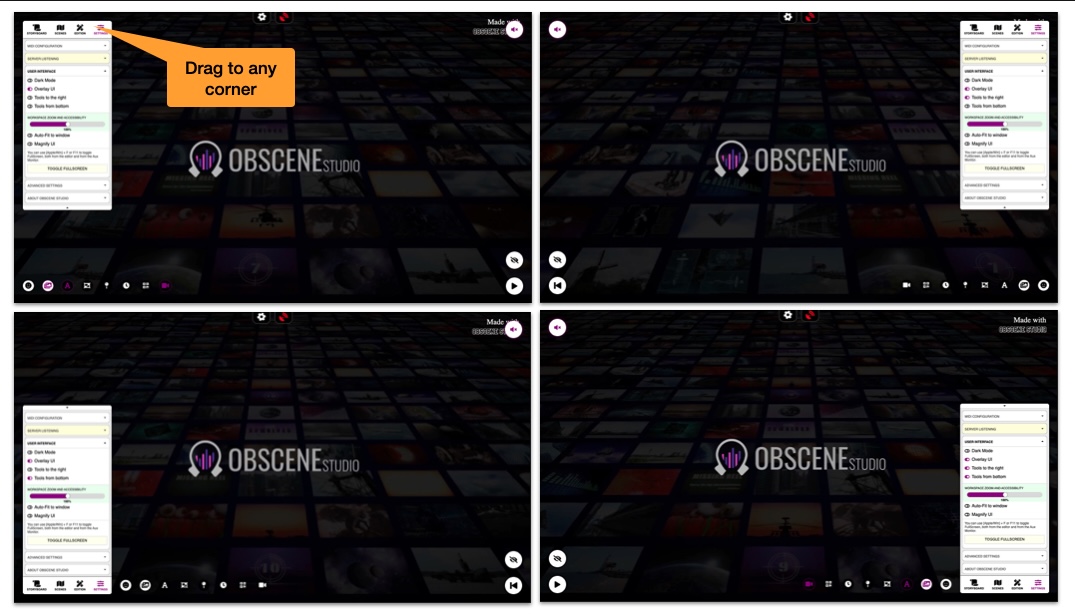 Change Side-Panel placement
Workspace Zoom and Accessibility
Zooms or reduces the Workspace, so you can edit Storyboards bigger than your screen, or magnify smaller storyboards to use the whole screen.
- You can switch on Magnify UI, if the workspace has been reduced too much and the User Interface is too small.
- You can also switch on Auto-Fit to Window so the storyboard always uses the available screen space. This toggle is only available in Overlay Mode.
Full-Screen Button
- Toggle Full Screen by pressing the Button.
- You can also press F11 or CTRL/META + F.
Advanced Settings
Coming Soon :)
