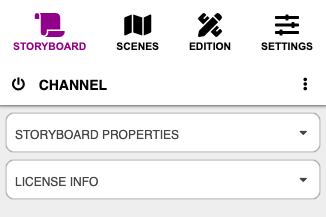
The Side Panel: Storyboard
The Storyboard Section of the Side Panel groups the main properties of your storyboard, basically those related to the Scene Size and general parameters like Autoplay Time, or default typefaces.
It also contains the License Info card with a summary of all third party content that you use across your different scenes.
Let´s take a look at each of the Property Cards:
Storyboard Properties
By clicking the Caret Icon, you can unfoldi the Storyboard Properties.
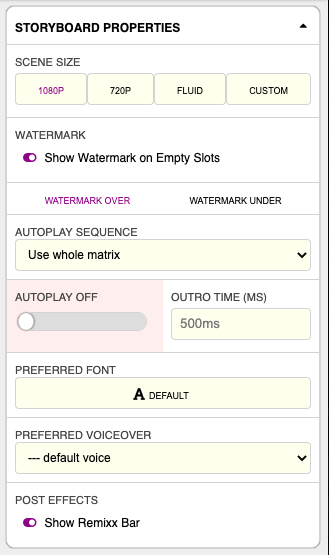 Storyboard Properties Property Card
Scene Size
Defines the resolution of the scenes in this storyboard. Press one of the buttons to select your resolution:
| Button | Resolution |
|---|---|
| 720p | 1280 x 720 ("HD") |
| 1080p | 1920 x 1080 ("FullHD") |
| Fluid | arbitrary |
| Custom | user provided |
- You must sychronize Obscene Studio Scene Size with OBS Studio for best results.
- The selector offers typical choices, and a CUSTOM mode where you can specify an arbitrary resolution.
Watermark
The Watermark Scene is a scene like any other, with the peculiarity that it is ALWAYS displayed.
- You typically place you channel logo and other permanent messages you want in your screen
Watermark Over / Under Sceme
This toggle determines if the Watermark Scene is rendered OVER the current scene, or UNDER it. There are subtle differences, and you might prefer one or the other depending on your storyboard.
- If the WATERMARK SCENE is OVER THE CURRENT SCENE, it cannot contain an opaque background (the current scene would be invisible behind it)
- If the Watermark Scene is UNDER the current scene, it can contain, for example, a Video Background that will be common for all other scenes - who do not have a background themselves - in which case they will obstruct the Watermark Background.
Take a look at the Scene Documentation, that further elaborates the different layers involved in the final image.
Autoplay Settings
When Scenes have a timer defined, Autoplay mode will be engaged. When the timer for the current scene expires, the next one will be displayed.
Autoplay Sequence
This selector defines the strategy to select the "next scene" when Autoplay is engaged.
Use Whole Matrix means the Scene Matrix will be traversed Up to Down, then Left to Right.
Autoplay By Columns means the AutoPlay will not escape the current column. You can then have several "autoplay groups" grouped by columns.
Autoplay Timer
This value defines the default timer for ALL scenes.
- If you assign, ie. 5 seconds here, autoplay will be engaged for all scenes.
- Just place scenes below each other ther enter PERFORM MODE to see how they are changed every 5 seconds.
- If you assign "0" (the default), scenes will not auto-play by default
- Each scene can define its specific autoplay timer, that will override this setting.
- When an Autoplay reaches a scene with time "0", it will stop there.
Outro Time
The Outro Timer is the default "Animation Out" time for your scenes - if their elements include OUT animations. This is the time Obscene Studio will wait for elements to play their out-animations before changing the scene.
- The value to use should be the time of the LONGEST out-animation in your scene.
- If elements have longer out-animations, they will be stopped
- Scenes can override this value for custom Animation Out Times.
- This value has no effect if there are no elements with out-animations defined
Preferred Font
This Combo-Box lets you choose the default font to use for Text Objects, if they don´t define a specific font.
Preferred Voiceoever
In this combo-box, you can select the system voice to be used to read aloud Voiceover texts in the scenes, or when you type stuff in the "Speech" realtime effect in The ReMIXX bar
Show ReMIXX bar
This Toggle enables and disables The ReMIXX bar
- If it is enabled, the ReMIXX bar will be displayed when in PERFORM MODE
- If it is disabled, it will not be displayed or available.
License Info
Obscene Studio keeps track automatically of the media you import from third parties, like Stickers and Images, and is able to generate the required credits for the use of it. You can also add attribution information to manually imported media, and the licensing information will be included with the rest.
This card,
- displays the media in your storyboard with their license information,
- Allows to auto-generate a "scrolling credits scene" that you can play anytime, to give proper attribution.
Related Links
- Back to the The Side Panel
- Scenes (Next section in the Side Panel)
