The 3D Camera
The Obscene Studio 3D Camera uses AI to display a detailed, realtime 3D model of your face. You can then attach tatoos, masks, and other objects like glasses, hats, or even custom 3D objects.
Many features like Directional, Spot Lighting or Particle Generators can be quickly configured and assigned to MIDI Controls. Likewise, you can generate MIDI Messages by moving your head or opening and closing your mouth, and connect with other events and objects in the scene.
 The Ortographic Camera and the rendered scene
The key 3D Camera features are:
An Illuminated 3D scene, with Ambient Lighting, and a customizable Directional Light or Spotlight.
Face Tatoos that you can design and instantly wear.
Face Skins, or elaborated textures that you can download or create yourself using an application to create standard 3D Materials
Accessories like hats, rings or medals. You can design your own just like in the case of Face Tatoos, but also import real 3D models.
Superpowers Particle Effects like Smoke, fire, water … and many other customizable presets
Virtual Room that you fully decorate with textured walls and a skybox
Camera setup and Scene Configuration
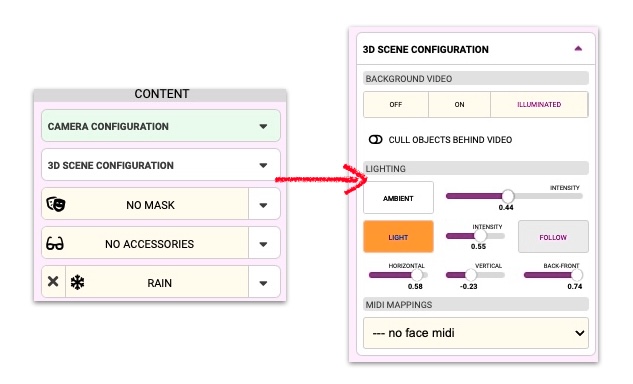
The first configuration card is the 3D Scene Configuration. It is here where you define the main parameters of the 3D scene.
Background Video
You can display or hide the Background Video, and decide whether it will react to the lights in the scene or not.
 Video OFF, ON and ILLUMINATED
| Video Setting | Description |
|---|---|
| OFF | Video is not displayed. |
| ON | Video is displayed but no light settings are applied to the video. Light settings are always applied to the 3D objects) |
| ILLUMINATED | Video is displayed, and scene light settins are applied. |
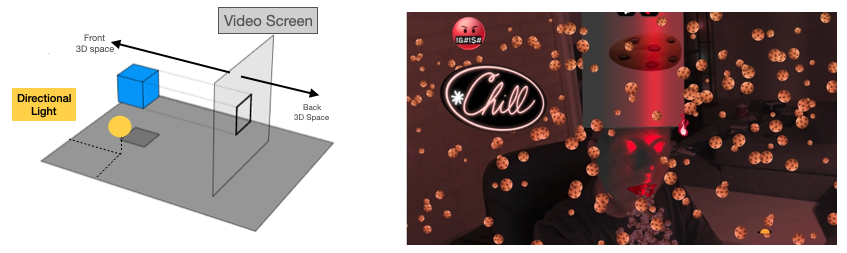
 The Video Plane is a Vertical Plane targeted by the Ortographic Camera, and it realistically reflects light, as light would reflect in a cinema projection screen
Ambient Light
An ambient light source represents an omni-directional, fixed-intensity and fixed-color light source that affects all objects in the scene equally (is omni-present).
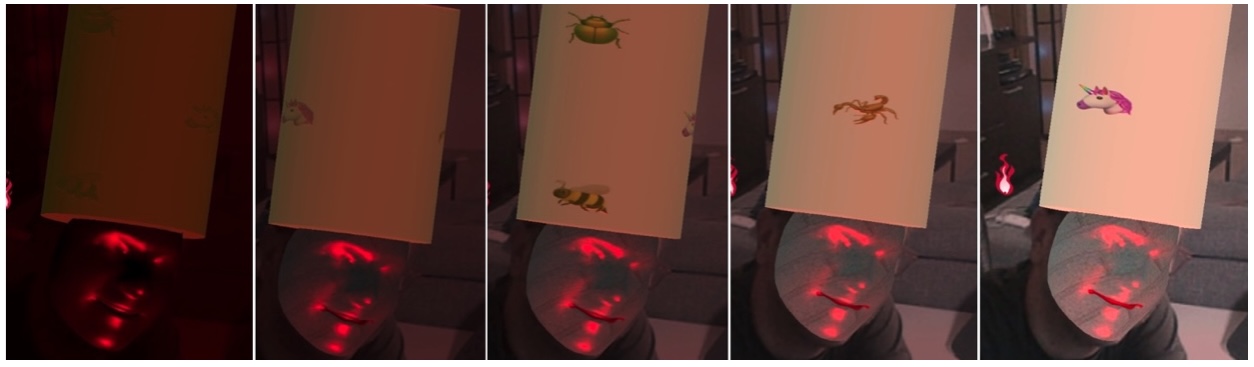 White ambient light at different intensities, with a constant red directional light pointint towards the face)
During rendering, all objects in the scene are brightened with the specified intensity and color. This type of light source is mainly used to provide the scene with a basic view of the different objects in it.
You can Set the Ambient Light color and its intensity in the Lighting section of the Scene Configuration card.
Directional Light
A Directional Light is a light that gets emitted in a specific direction, from a source that is very far away. The rays of a Directional Light are all parallel. This kind of light is used to simulate sunlight or moonlight.
The 3D camera scene features a Directional Light with a customizable Color, Intensity, and a virtual 3D Position, that is used to calculate the direction to the target.
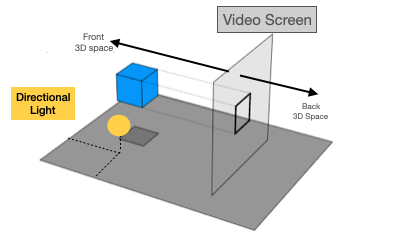
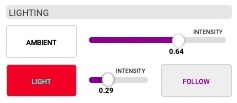
 Playing with the Directional Light color and Position in Obscene Studio
The target of the directional light is:
- The center of the scene, by default.
- The position of your face, if FOLLOW button is enabled.
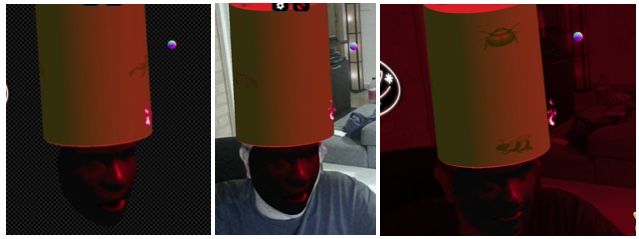
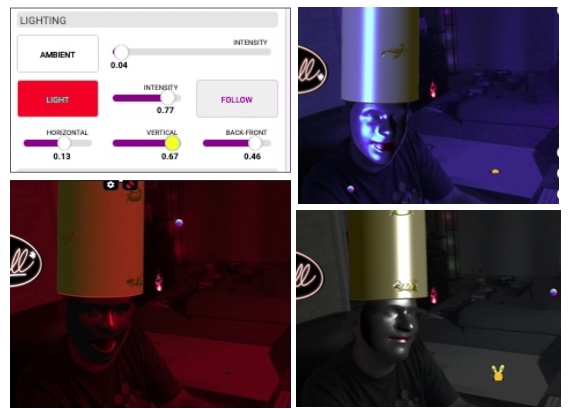
 Different video and lighting settings: Illuminated Video with yellow and red directional lights, No background video + purple light, no video illumination
Spotlight
A Spotlight illuminates in a concentrated spot. The light gets emitted from a single point in one direction, along a cone that increases in size the further from the light it gets. Spotlights are typically used to simulate a flashlight, a desk lamp or a streetlight.
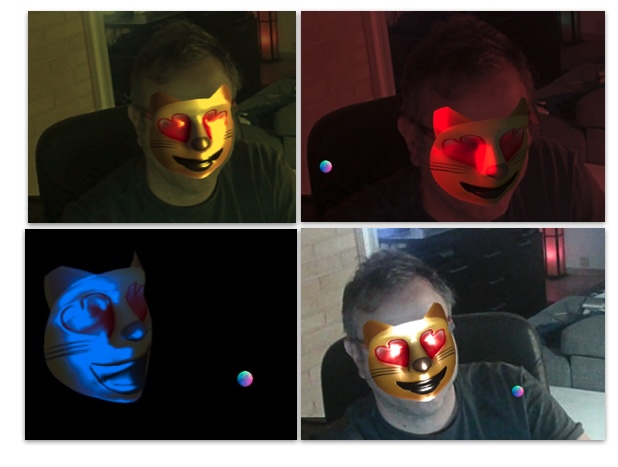
 Playing with the Spotlight color and Position in Obscene Studio
To use a Spotlight, just press the "SPOT" button. This will toggle the light type between a Directional Light and a Spotlight - You cannot have it both on your scene.
Spotlights have two other customizable parameters:
Penumbra : Percent of the spotlight cone that is attenuated due to penumbra.
Cone: Regulates the extent of the spotlight from its direction.
Face Gestures and MIDI
You can generate MIDI events using the following Face Gestures:
- Open your mouth
- Look to the left or right
- Look up or down
Just select a range of controllers and such events will be generated. You can later attach them to other actions in the MIDI INTERACTION card.
MIDI INPUT
In addition, you can map any midi controller or button to specific actions of a 3D Camera such as:
- Change Ambient or Directional light intensity
- Change Accesories Spin or Emissive Color intensity
- Change Face Mask or Tatoo Emissive Color Intensity
- Select a Superpower, change its throughput or strength
The Face Tatoo and Skins
By pressing the Face Control, you can select a saved Face Tatoo or Skin, or design a new one from scratch using the Face Studio tool.
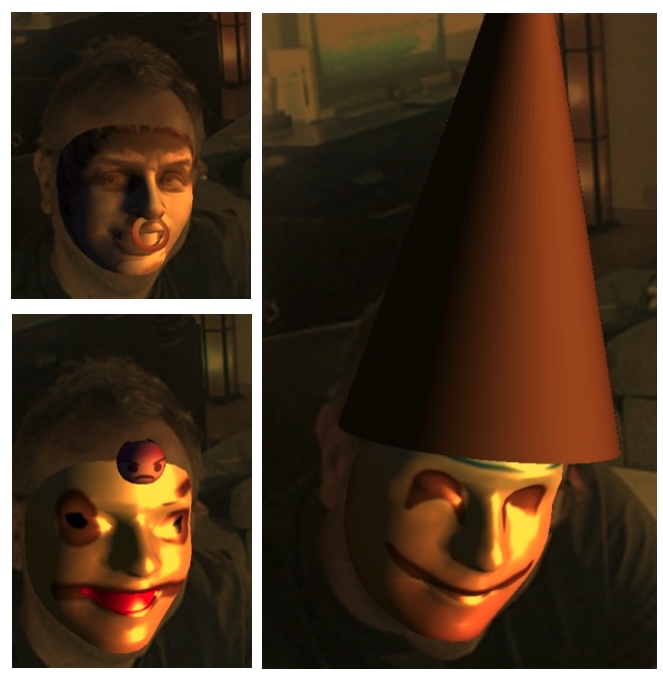
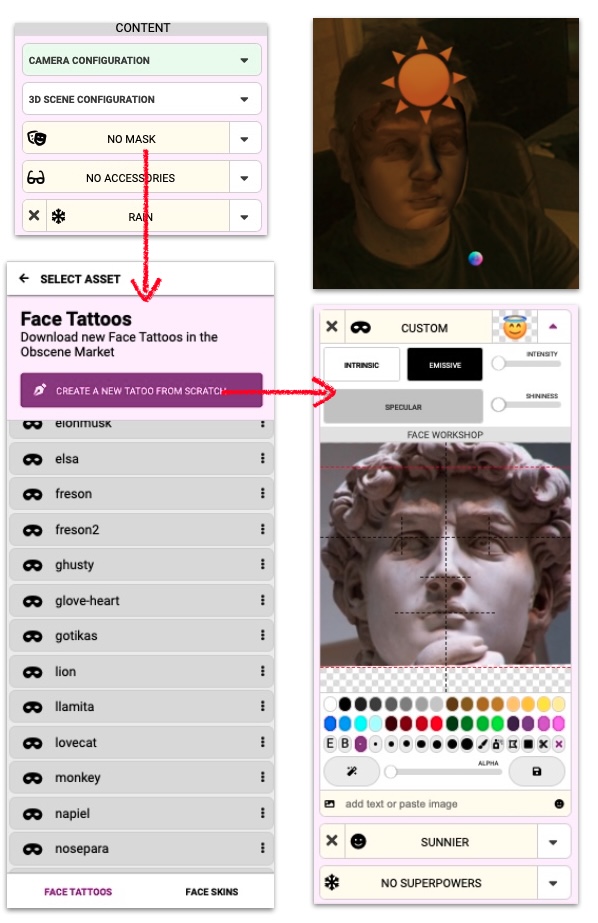 Face Tatoo workflow: Selecting a new one, creating one from scratch, editing the tatoo, the final result
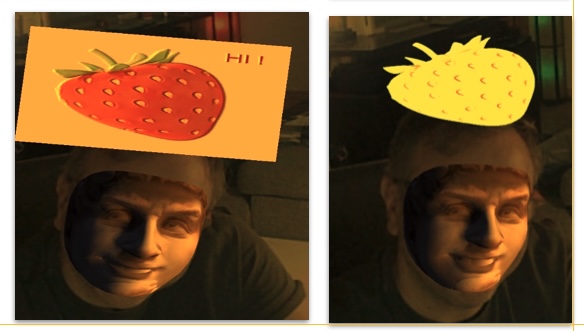
You can import emojis and images into the Face Studio tool, then align them to the guides. Your face will adopt the texture immediately !
Tatoos and Skins, what´s the difference?
- Tatoos are created by you using the Tatoo Studio, or downloaded from the Obscene Market.
- Skins are elaborated textures that you can create in 3D programs, or download from a Material Library. There are hundreds online.
Accessories
Add a more personal touch with piercings, hats, shields, … the accessory workshop has everything you need !
Additionally, Obscene Studio also supports standard 3D objects (GLTF), that you can import amd attach to your face automatically.
Creating an accessory from scratch
The Accessory Studio provides lots of options to create your perfect accessory.
 Accessory Studio
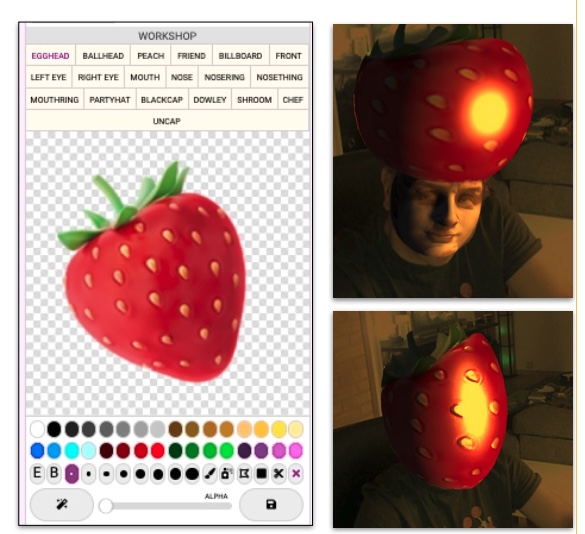
First thing you want to do is to decide the Accessory Type.
Accesory Types
Just select what kind of accessory you want from the top menu, and a sample will be displayed.
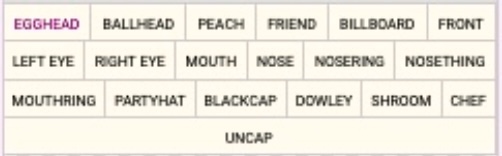 Accessory type
| Type | Description |
|---|---|
| Egghead | A giant egg-like thing covers your face |
| Ballhead | A giant ball covers your face |
| Peach | A giant ball covers half of your face |
| Friend | A loyal friend stuck yo your forefront |
| Billboard | A big billboard at the top of your head |
| Front | A spherical pet attached to your forefront |
| Left eye | A spherical left eye |
| Right eye | A spherical left eye |
| Mouth | A spherical friend atteched to your mouth |
| Nose | A spherical friend attached to your nose |
| Nosering | A big nose ring |
| Nosething | A aquare attached to your nose, that you can sculpt |
| MouthRing | A little pierce in your lips |
| Partyhat | A big hat |
| Blackcap | A bigger hat |
| Dowley | A smaller hat |
| Shroom | Another hat |
| Chef | Yet another hat |
| Uncapped | An uncapped chef hat |
 Small and big Billboards
 Rings, Amulets and Crazy hats
Using a custom 3D model
In the Accesory Browser you can find the "3D Models" section. This section will list all 3D models that you have imported into Obscene Studio.
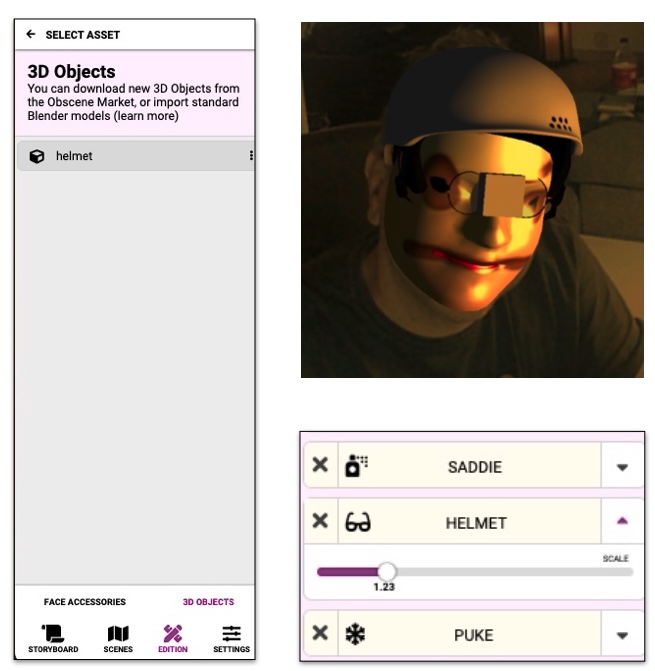 Browsing and displaying a custom 3D model over your face in Obscene Studio
Importing new 3D models
You can import 3D models
- By downloading them from the Obscene Market. This would be the easiest option, as those models are already adjusted and ready to use.
- By downloading them from any website in the correct format
- By creating them using an application like Blender, then saving the model in the correct format.
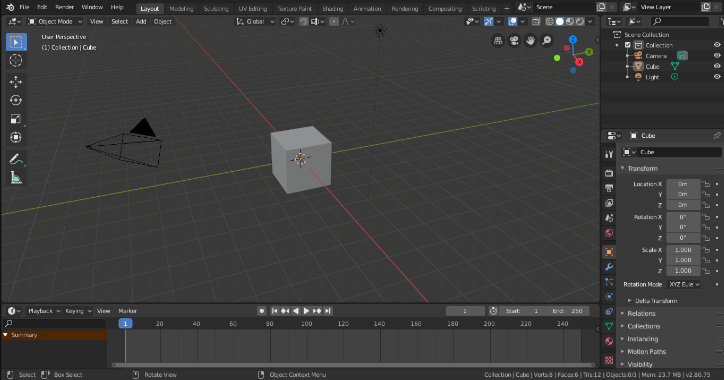 Blender, a popular application for all things 3D
Super Powers
This side of the multiverse, you now have superpowers that you can trigger with face gestures or a midi controller.
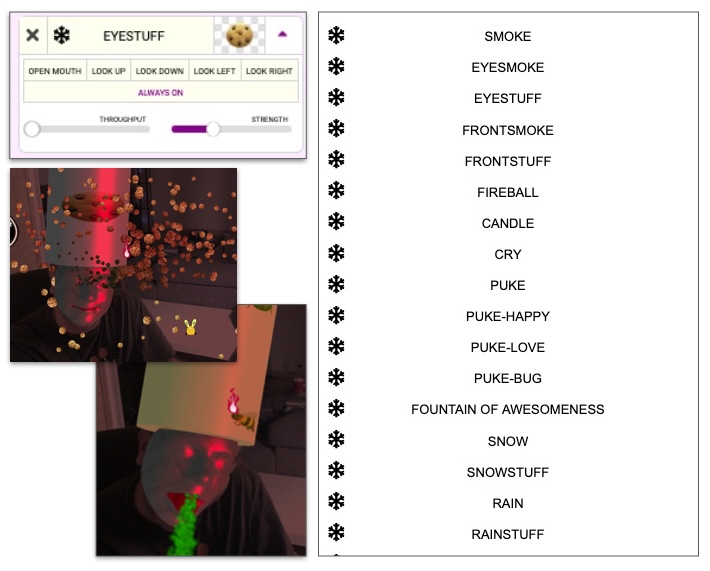
Just select a Superpower from the Pop-Up menu, then adjust the parameters if desired. You can adjust the following parameters:
Trigger
The face gesture that triggers the Superpower.
| Gesture | Action |
|---|---|
| Open Mouth | Superpower is enabled when you open your mouth, and disabled when you close it. |
| Look Up | Superpower is enabled when you look up, and disabled in other cases |
| Look Down | Superpower is enabled when you look down, and disabled in other cases |
| Look Left | Superpower is enabled when you look to the left, and disabled in other cases |
| Look Right | Superpower is enabled when you look to the right, and disabled in other cases |
| Always On | Superpower is always enabled |
Strength and Throughput
These two parameters allow to increase or decrease the magic. They can be mapped to MIDI controllers.
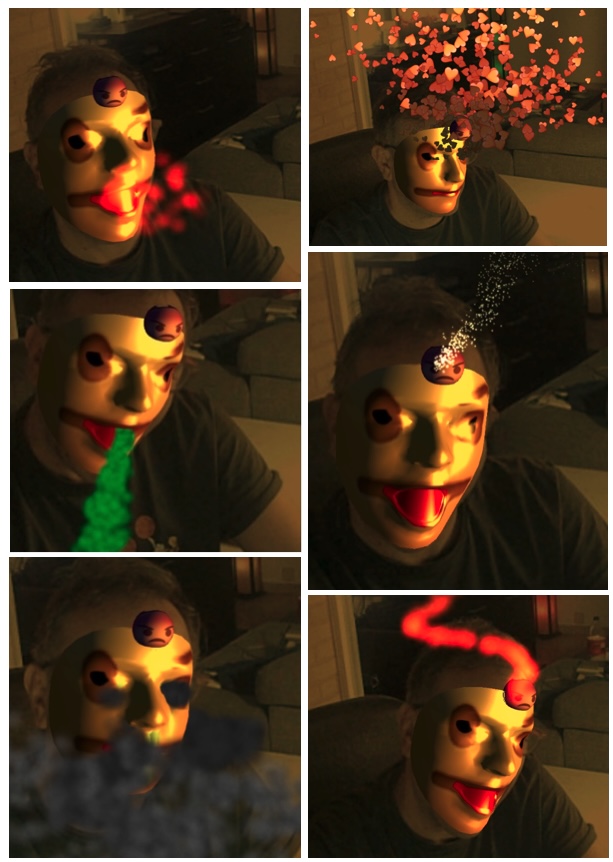 Different Superpowers in action
The Virtual Room
Welcome to 3D Live Streaming! Download or decorate your own Virtual Room from scratch, choosing the floor, ceiling and wall materials.
You can then manipulate the 3D camera while live streaming, show the room from different angles, control the dynamic lighting …
Please check out the specific document about 3D Live Streaming.
Related Links
- The Camera Object
- All Objects
