Common Object Properties
All the different objects that you can insert into a scene have a common set of properties, and a specific set of properties. This document focuses on the first ones: The properties like position, size, and some others, that are common to all objects regardless of their type.
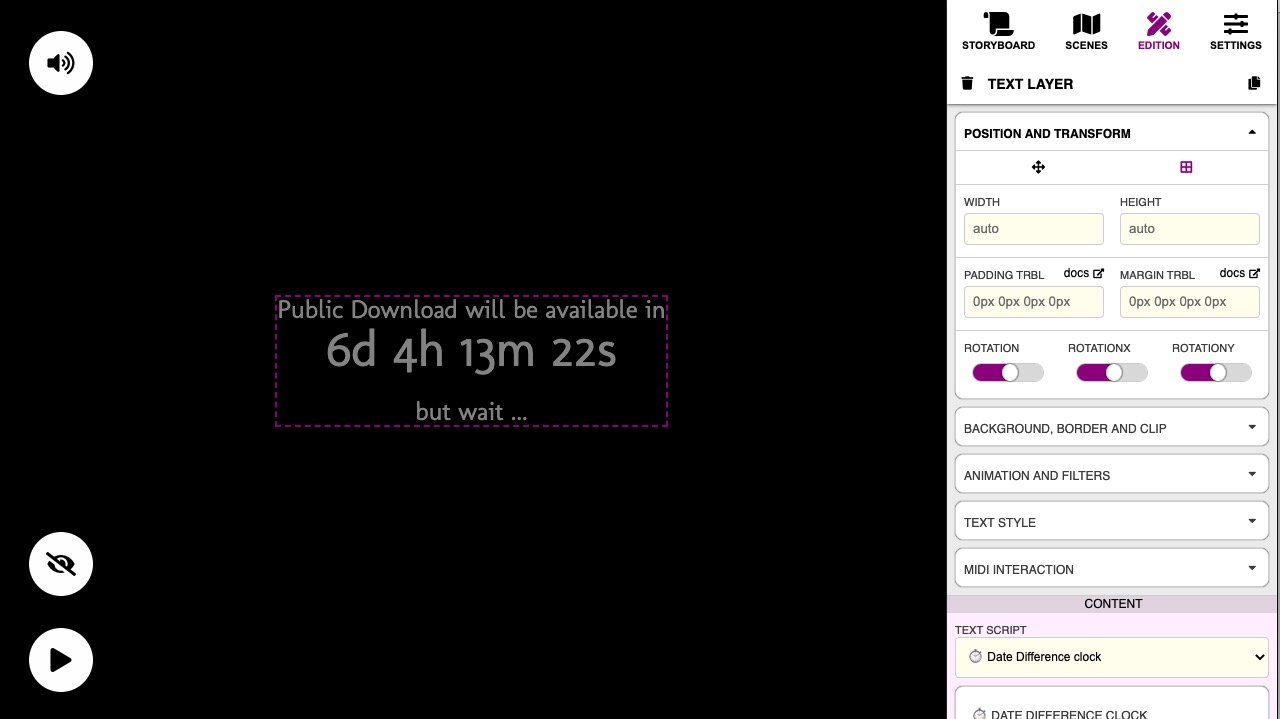
For the sake of example, the picture below shows the Side Panel displaying the properties of the Text Marquee at the bottom. Properties are displayed grouped in Cards.
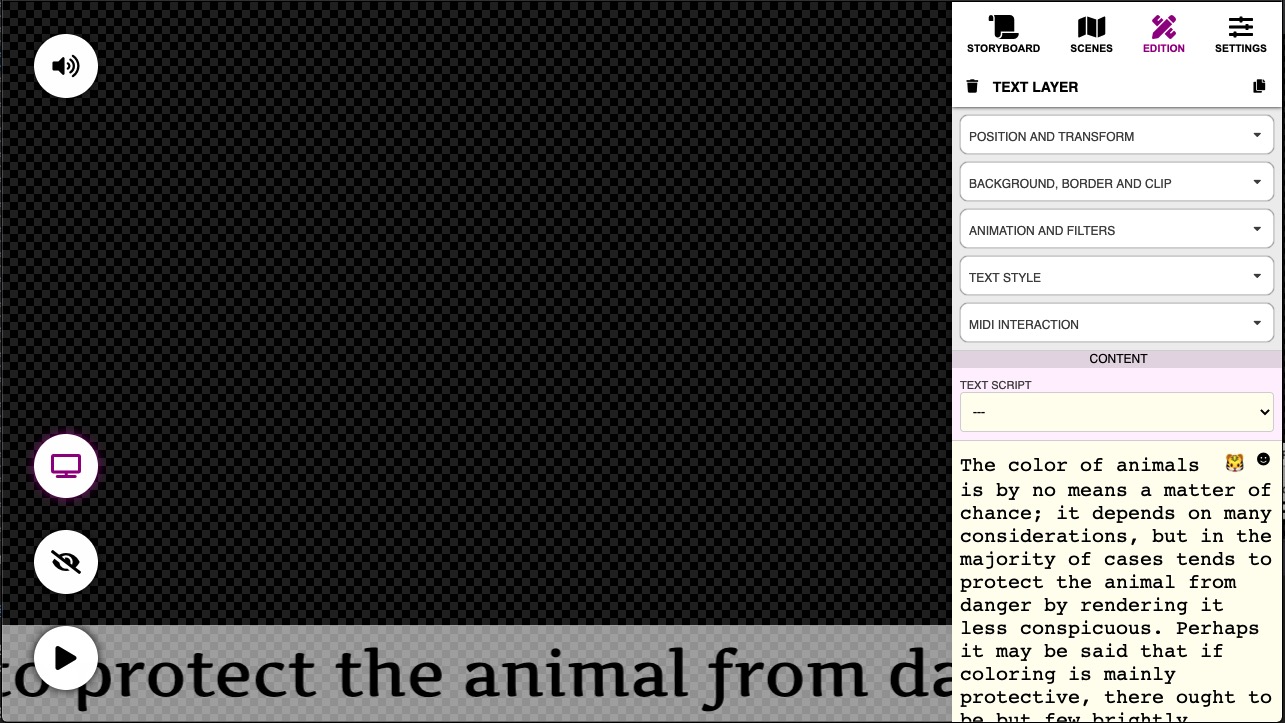 A Text Marquee object and its properties on the Side Panel
Common Properties
The following Property Cards are common for all objects:
 Common Property Cards: These exist for all objects
Let´s take a closer look at them:
Position And Transform
In this card you can adjust the properties that define the position and size of the object in the scene.
An object can have 2 types of positioning, defined in the first row of the card:

Free Position, where objects can be placed anywhere, even on top of each other.
In-Flow Position, where all objects in the scene auto-stack in rows or columns, and you define the vertical and horizontal alignment.
Free Position
When an Object has a Free position, you can fill the following properties:
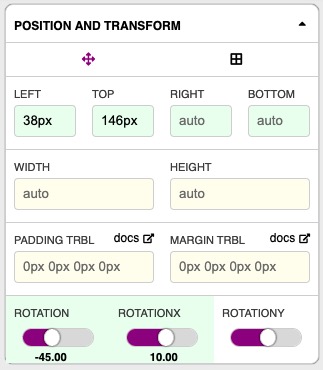
- The LEFT, TOP corners of the object
- The RIGHT, BOTTOM corners of the object
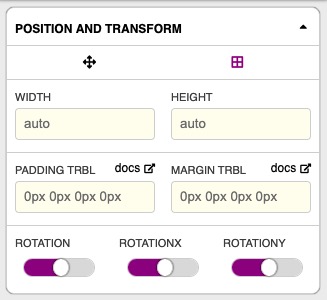
- The Object Width and Height
- The Rotation and Gravity Center
The position boxes are updated automatically as you drag the object around the workspace.
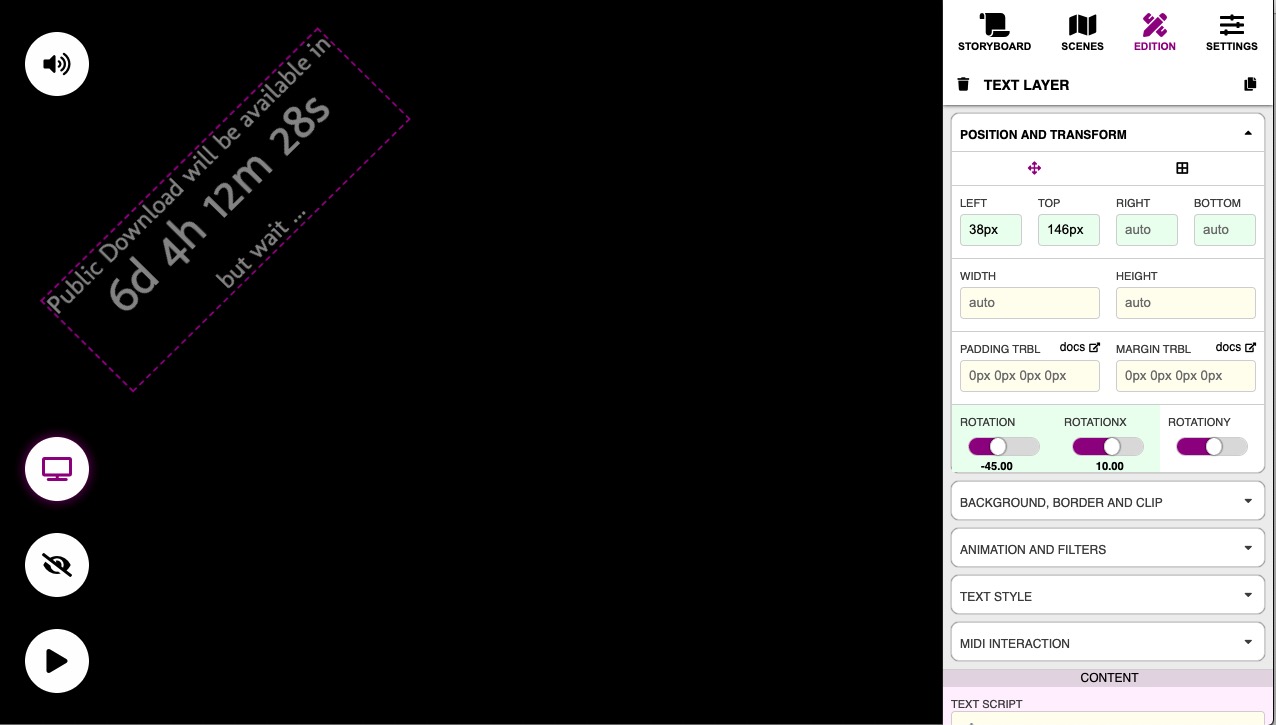
Mind that objects are not always draggable or resizable with the mouse or touch. Some conditions have to be met:
To Drag an Object around, it has to be Positioned
- An Object is Positioned if it has an explicit LEFT or RIGHT, and TOP or BOTTOM value.
- If an object is only positioned horizontally, you will not be able to drag it vertically, and vice-versa.
- In-Flow objects are not positioned
To Resize an Object with the mouse or touch, it has to have a defined size
An Object has a defined size when it has
- An explicit Width or Height
- A LEFT and RIGHT position, that defines its width
- A TOP and BOTTOM position, that defines its height.
If an object only has its vertical size defined, you will not be able to resize its width (it will be locked), and vice-versa.
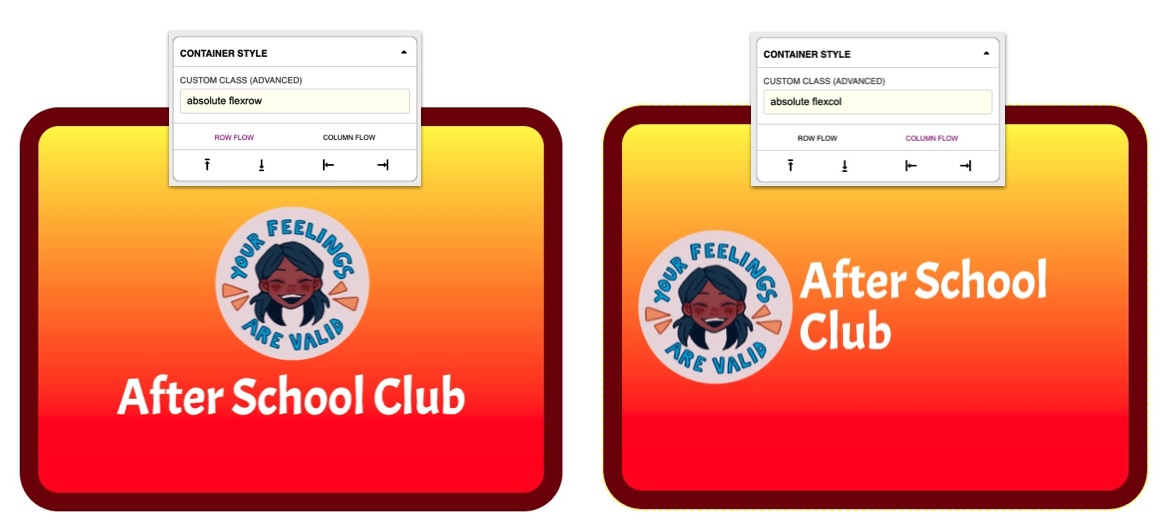
In-Flow Placement
 Selecting in-flow positioning
When an object has an In-Flow position, its position is determined by the Grid, which can be Horizontal or Vertical.
 An Object with a Centered in-flow position
Objects will stack one over the other, or next to the other, depending on the grid configuration and alignment policy.
You can adjust the grid properties in the "SCENE STYLE" Card, or in the "CONTAINER STYLE" Card if the Object is inside a Container Object.
 A Container with Objects with in-flow position
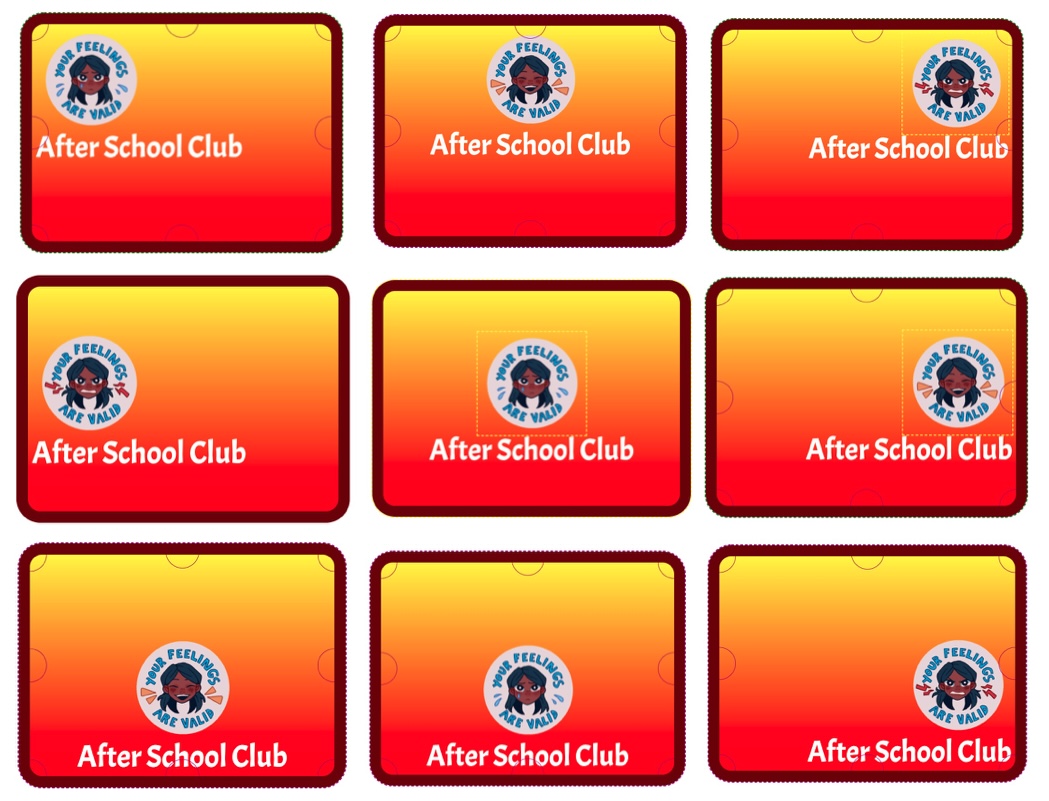 Different Alignment Policies for a Row-Flow
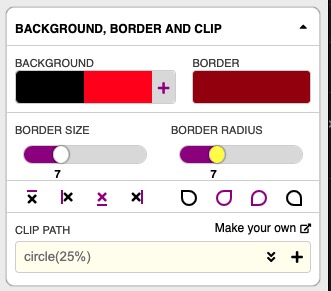
Background, Border and Clip
In this card you can define the Object Background and other properties that affect the object container, like the ** border** and the clipping mask.
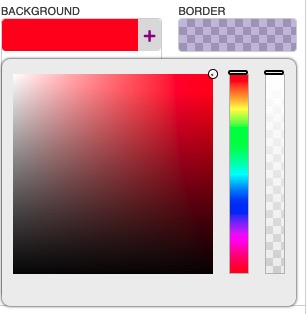
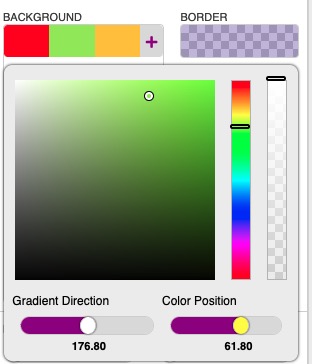
The Backgrouund Gradient or Solid Color
Just click on the Color Box to reveal the Color Picker, then choose your Background Color.
- Add additional colors -turning the background into a gradient- by pressing the icon
- Delete colors by holding SHIFT while pressing a Color Box.
- Adjust gradient properties like rotation or distance by choosing an intermediate color and adjusting the sliders at the bottom of the color picket
| The Color / Gradient Pickers | Adjusting a Gradient |
|---|---|
 |
 |
Border Size and Border Disable
- Move the Slider to adjust the Border Size
- The buttons below the slider allow disabling specific borders (top, left, bottom, right)
Border Radius and Radius Disable
- Move the Slider to adjust the Rounded Borders
- The buttons below the slider allow disabling the rounded border in a specific corner.
Box Shadow
Type a Box Shadow Expression to add one or mutiple Shadow to the object.
You can expand the panel and find some presets by pressing the icon.
You can assign a color for some of the presets, while the most complex ones will include the color in the expression, that you can edit manually.
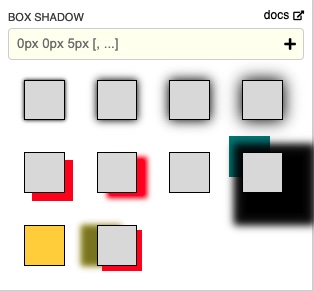
Box Shadow Configuration Panel
Clip Path
You can assign an arbitrary poligon, circle or ellipse to clip an object, like the Map Object below:
 Map Object with an Arrow Clip Mask
Press to reveal different pre-set clip paths, or type its expression in the text box
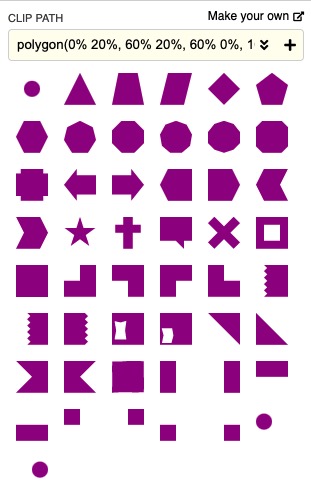
For more elaborated or cusom clipping paths, use the linked tool "Make Your Own" to interactively design a custom mask ( External tool not provided by Obscene Studio)
 Popular thrid part tool linked from this property card
Clip Mask
For more complex clipping, you might need a Mask. Masks are arbitrary bitmap (PNG) or vector (SVG) images, that can remove, or apply degrees of transparency to arbitrary chunks of the original picture.
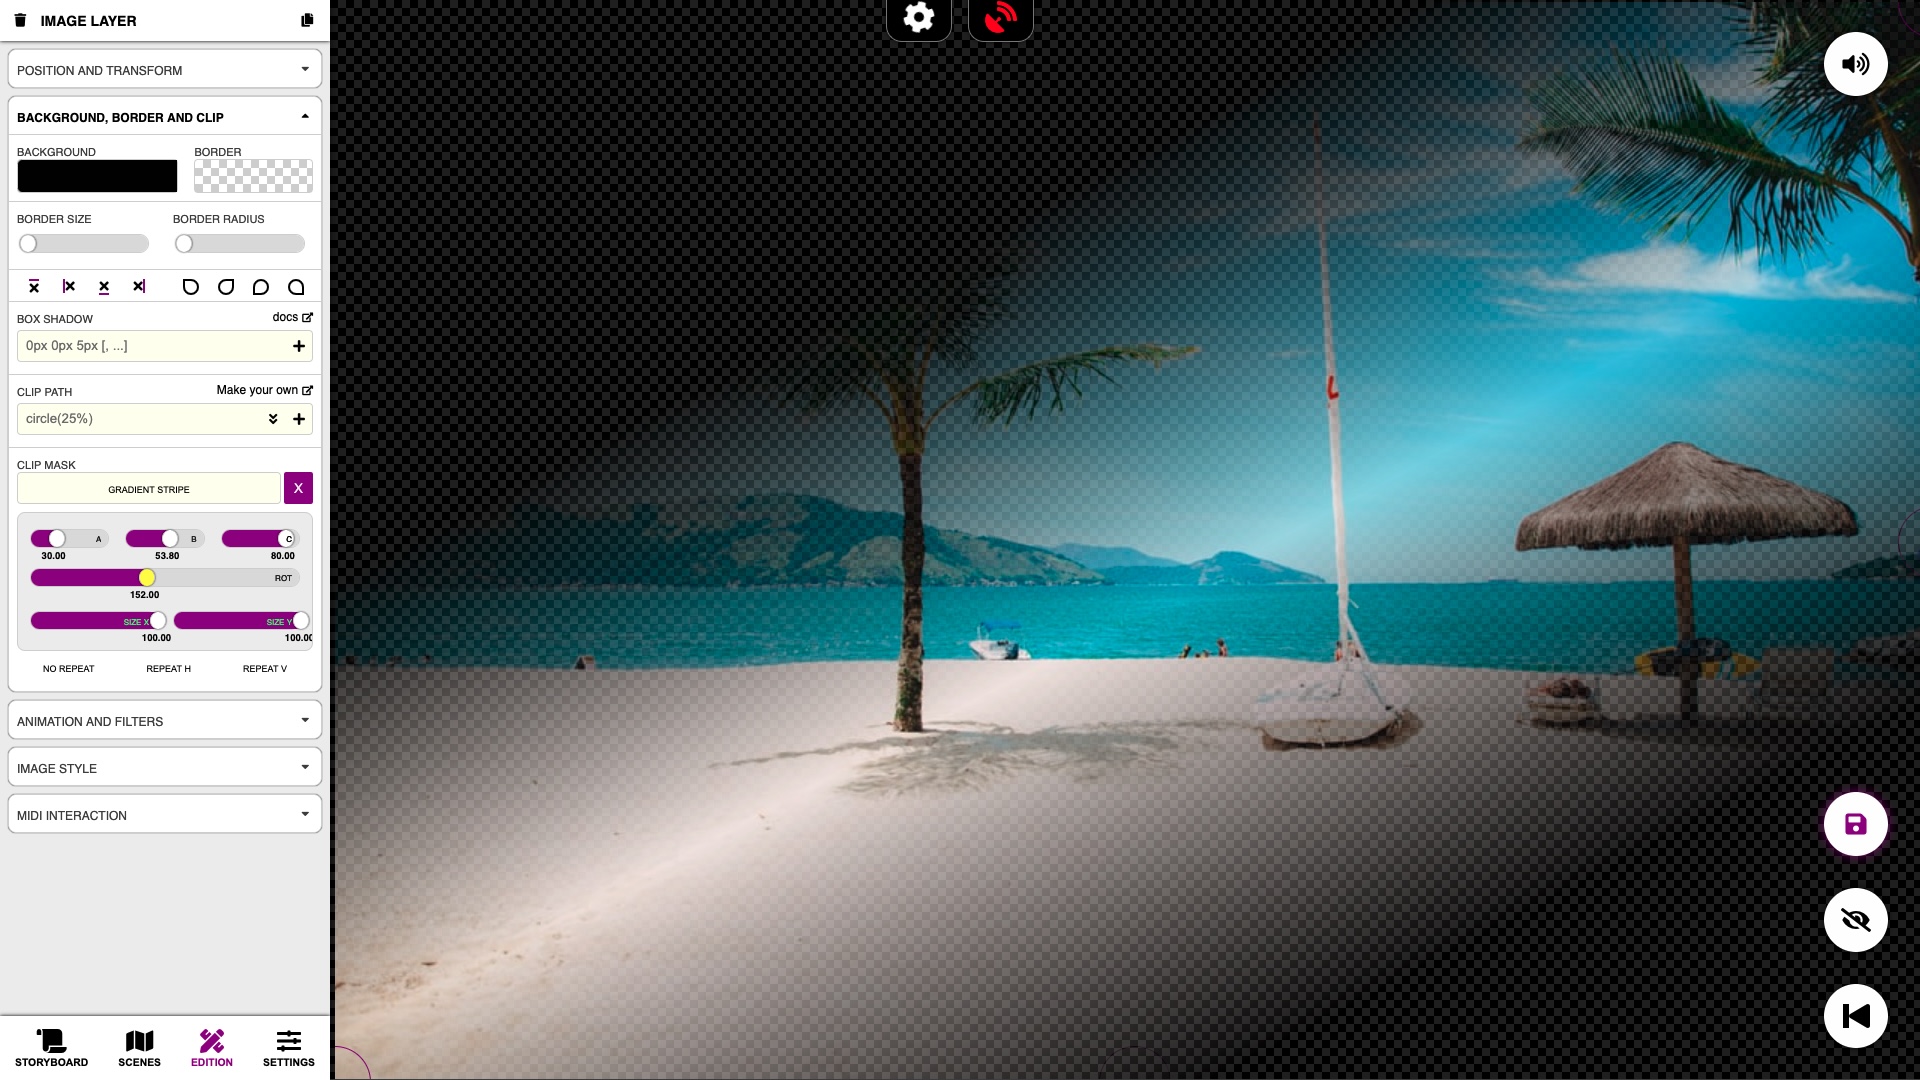 Configuring a gradient mask for an image
Obscene Studio provides some general purpose gradient masks, and you can also upload your custom ones as PNG or SVG images.
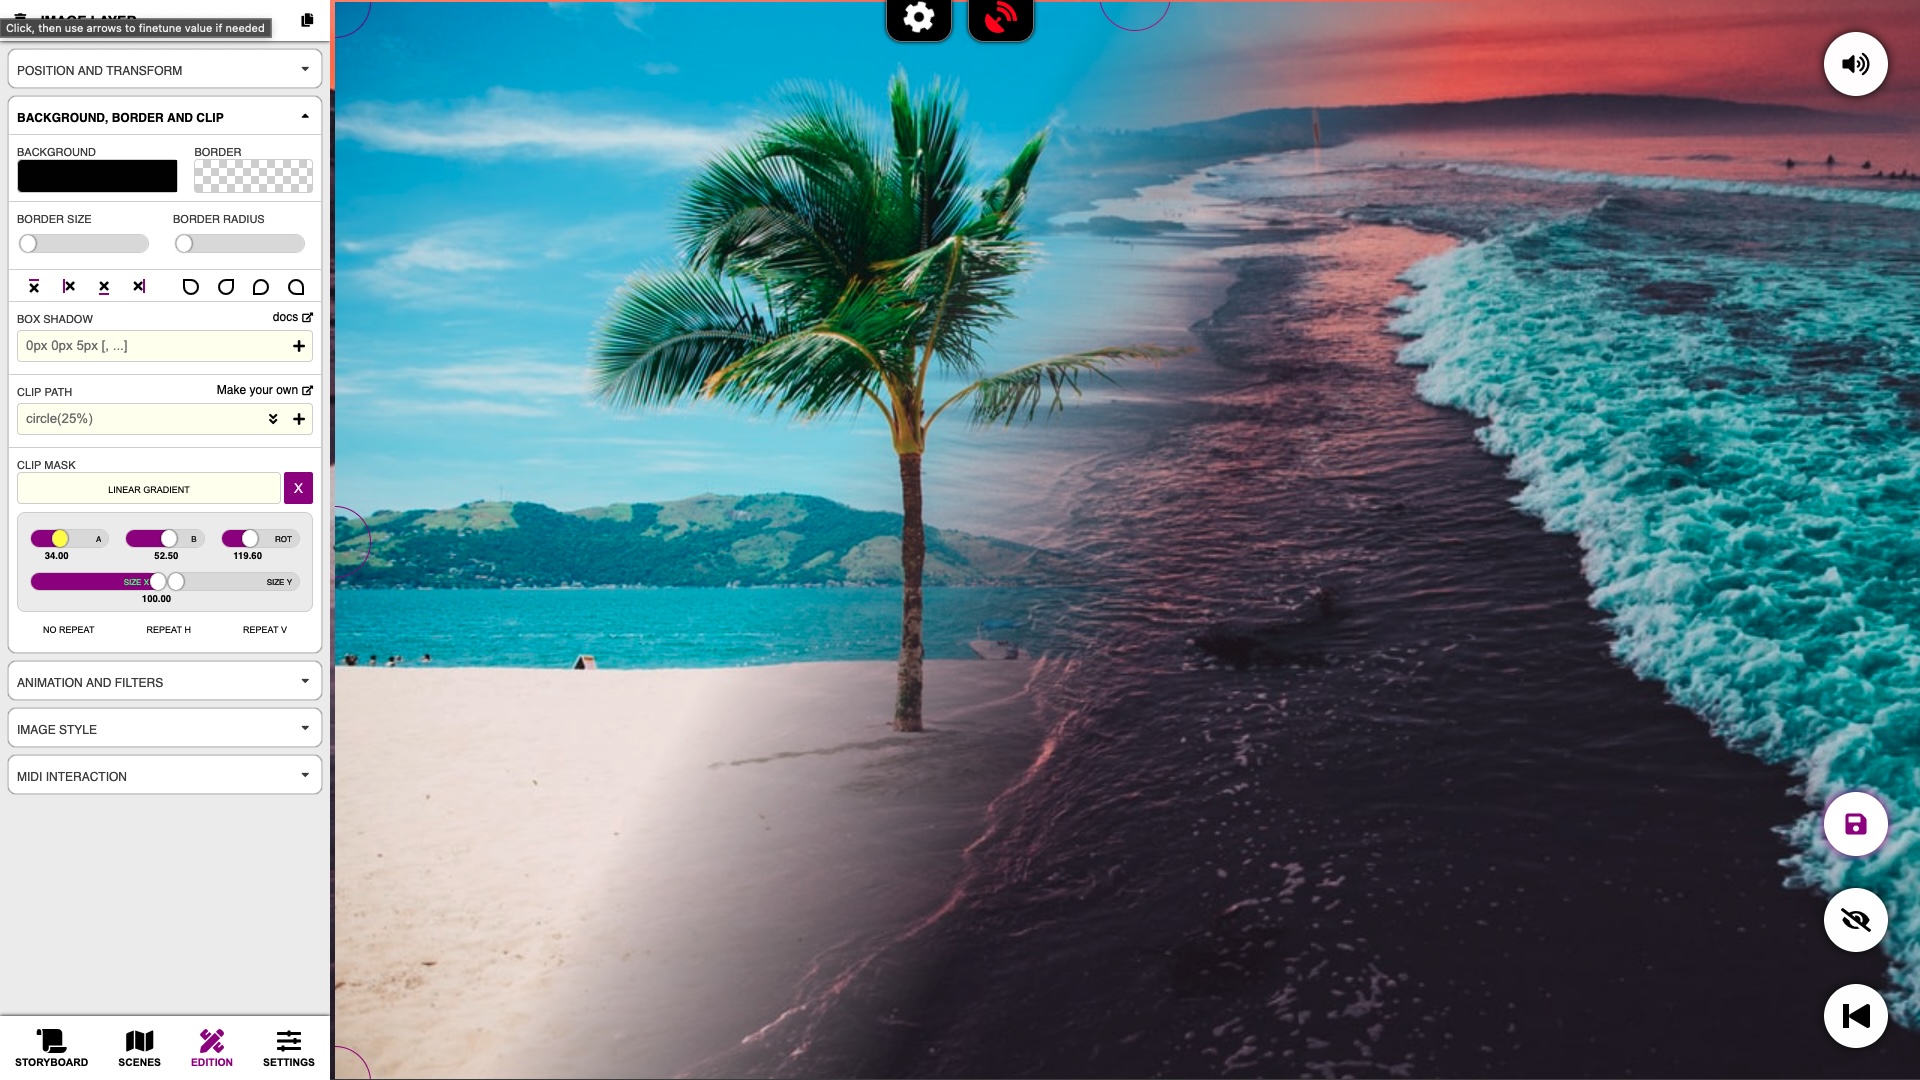 The background blends seamlessly with the image using a Gradient Mask
 Mask Property Card, displaying gradient masks and a custom image mask.
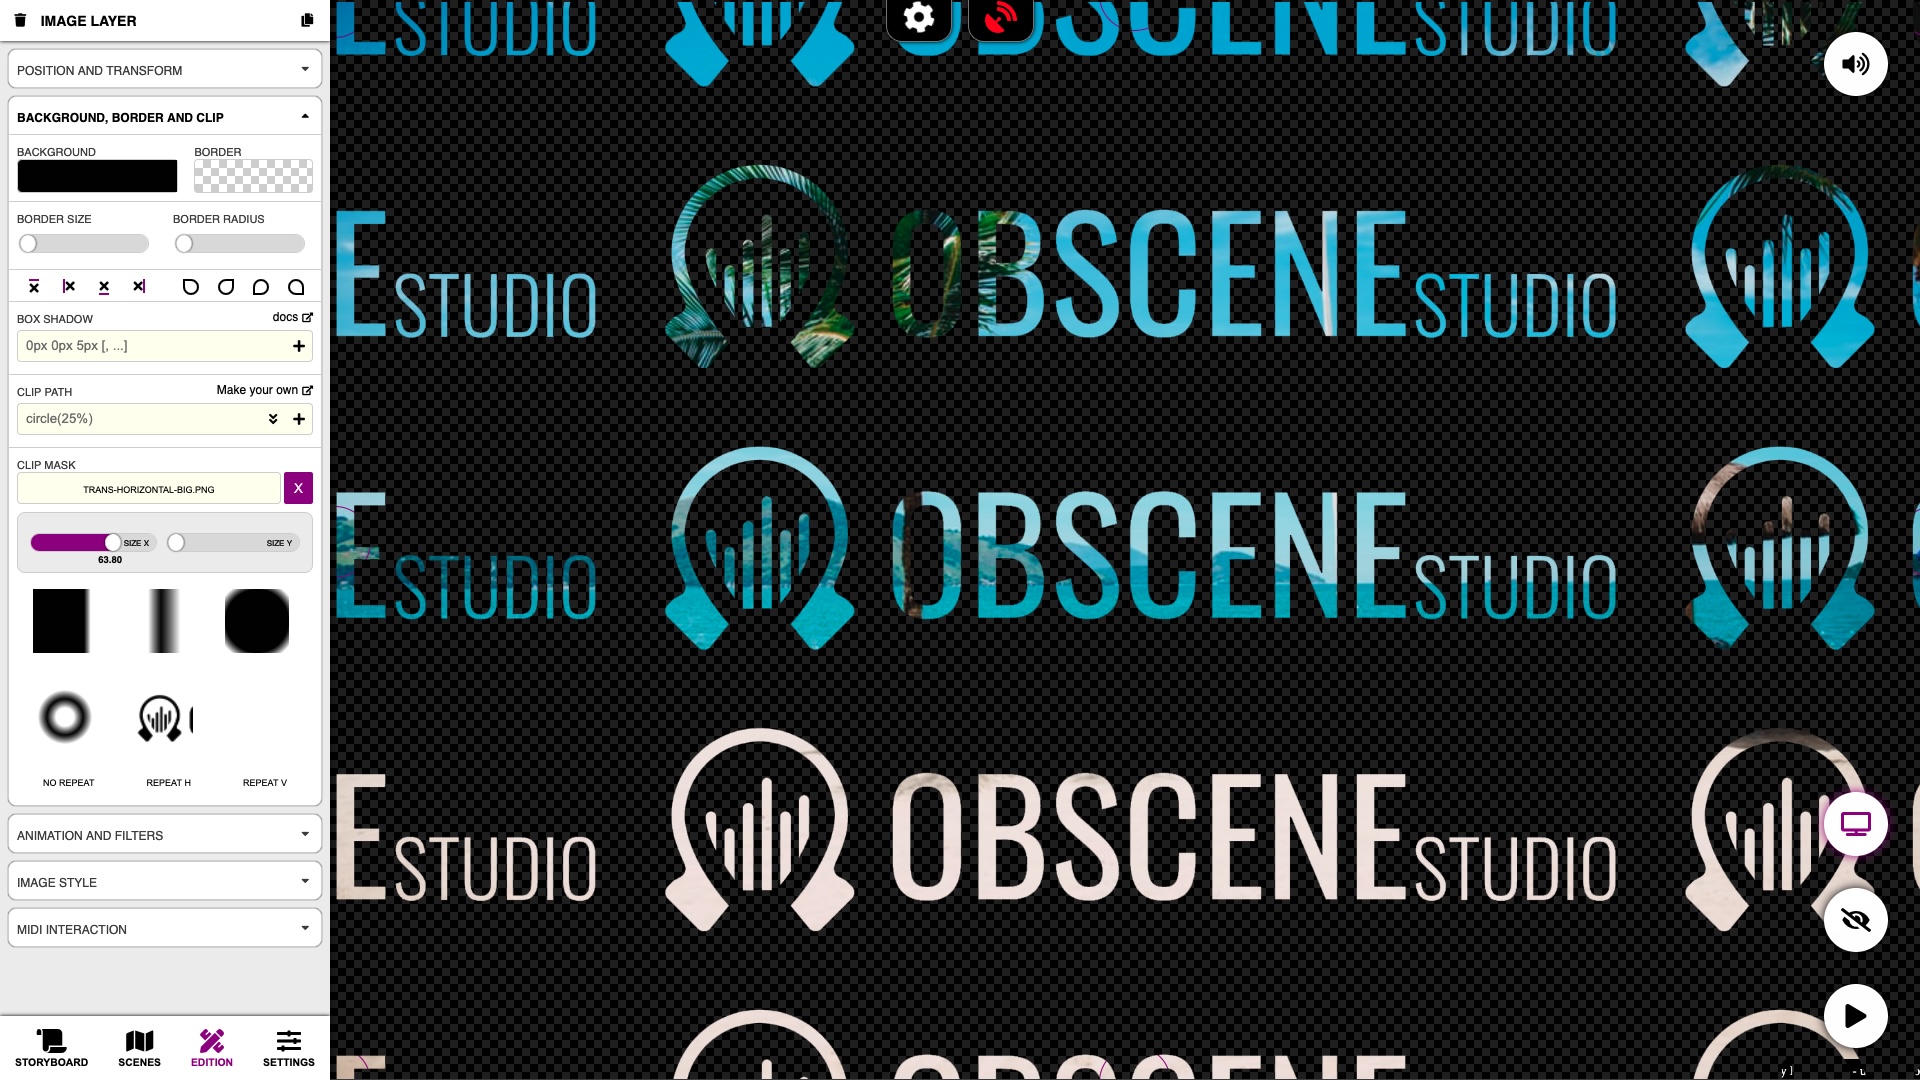 A custom SVG mask with repeat options
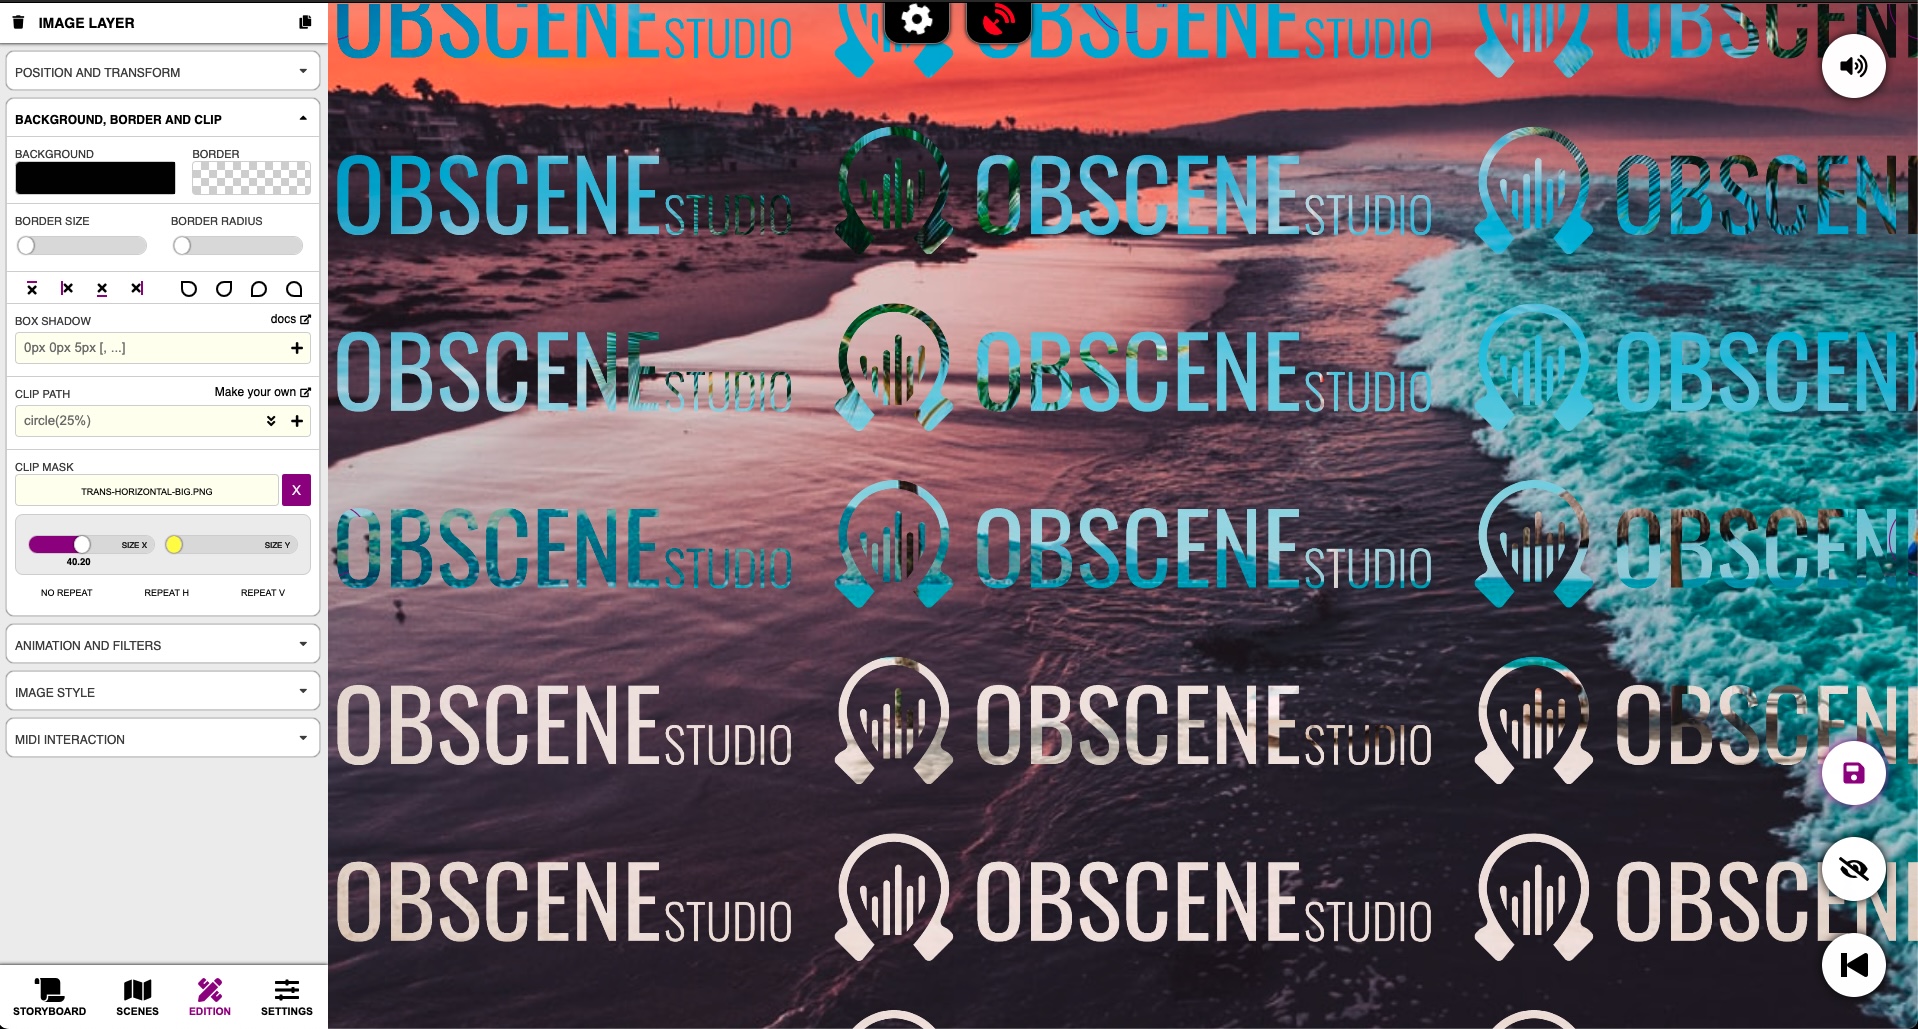
Your custom PNG or SVG masks should be:
- Transparent on the parts you want to remove
- Opaque (any color - black is the convention), on the parts you want to keep
- The Alpha Channel (Transparency) controls how much of the original image to include in the masked one.
Mask Animations
Some Object Animations apply to masked objects:
| Animation | Description |
|---|---|
| Mask Top | Moves the Mask from Top to Bottom |
| Mask Bottom | Moves the Mask from Bottom to Top |
| Mask Left | Moves the Mask from Left to Right |
| Mask Right | Moves the Mask from Right to Left |
| Mask Scale 2D | Scales the mask from very small to the current setting |
| Mask Unscale 2D | Scales down the mask from the current setting to zero (invisible) |
| Mask Scale Height | Scales the Mask Height, from zero to the current height |
| Mask Scale Width | Scales the Mask Width, from zero to the current width |
Mask Midi Mappings
You can map some mask parameters to MIDI controllers:
| Midi Mapping | Description |
|---|---|
| FX: Mask Position X | Changes Mask Horizontal Position |
| FX: Mask Position Y | Changes Mask Vertical Position |
| FX: Mask Width | Changes Mask Width |
| FX: Mask Height | Changes Mask Height |
Animation And Filters
These properties control the Object Animation and the Filters applied to the Object.
The Show Delay
You can set a "Show Delay" to the objects, so they are not initially visible when displaying the scene.
When the specified time has elapsed since scene has been displayed, the object will be displayed, playing its IN ANIMATION, if defined.
Animations
An object can have 2 animations
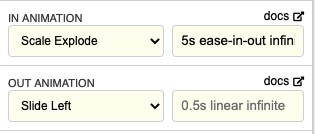 Setting up an In and an Out Animation
the IN ANIMATION, played when the object is first drawn
- Normally when displaying the scene, but maybe later if the Object has a Show Delay, or is hidden and shown using MIDI Controllers.
- In the case of Ticker Objects (Image Carousels, Multi-Text and Multi-QR Objects), the animation will also be played when a new image / text or QR is about to be displayed.
the OUT ANIMATION, played when the Object is about to be hidden
- Normally, when changing the scene. But maybe earlier, if the Object is Hidden using MIDI Controllers.
- In the case of Ticker Objects, the OUT animation will also be applied to the exit image / text or QR.
Just select an animation from the selectors.
The box to the right defines the animation duration and interpolation algorhythm. Please check out the linked documentation.
MIDI Interaction
You can map any midi controller to properties of this Object. Please check out the Midi Mappings section for details.
Related Links / Next Steps
- Back to The Scene
- Visit the pages for the Text Box, Multi-Text Box , QR Code , Emoji, Map, Camera, Video , Container
Media Credits: "Summer" by Elizeu Diaz - "Along the Shoreline" by Xan Griffin (unsplash) - Map Imagery (C) OpenStreetMaps Contributors - "Your Feelings Are Valid" by Unicef (GIPHY)
